Quick Start
The fastest way to get up and running
This Quick Start Guide is those of you who just want to get up and running as quickly as possible. If you’d like the full tour of the Bela hardware and software, which gets you acquainted with the Bela IDE and introduces some core Bela concepts then continue to Say Hello To Bela.
Table of contents
- Step 1: Assemble your hardware
- Step 2: Plugging in
- Step 3: Load the IDE
- Step 4: Build an example project
Step 1: Assemble your hardware
Bela Gem
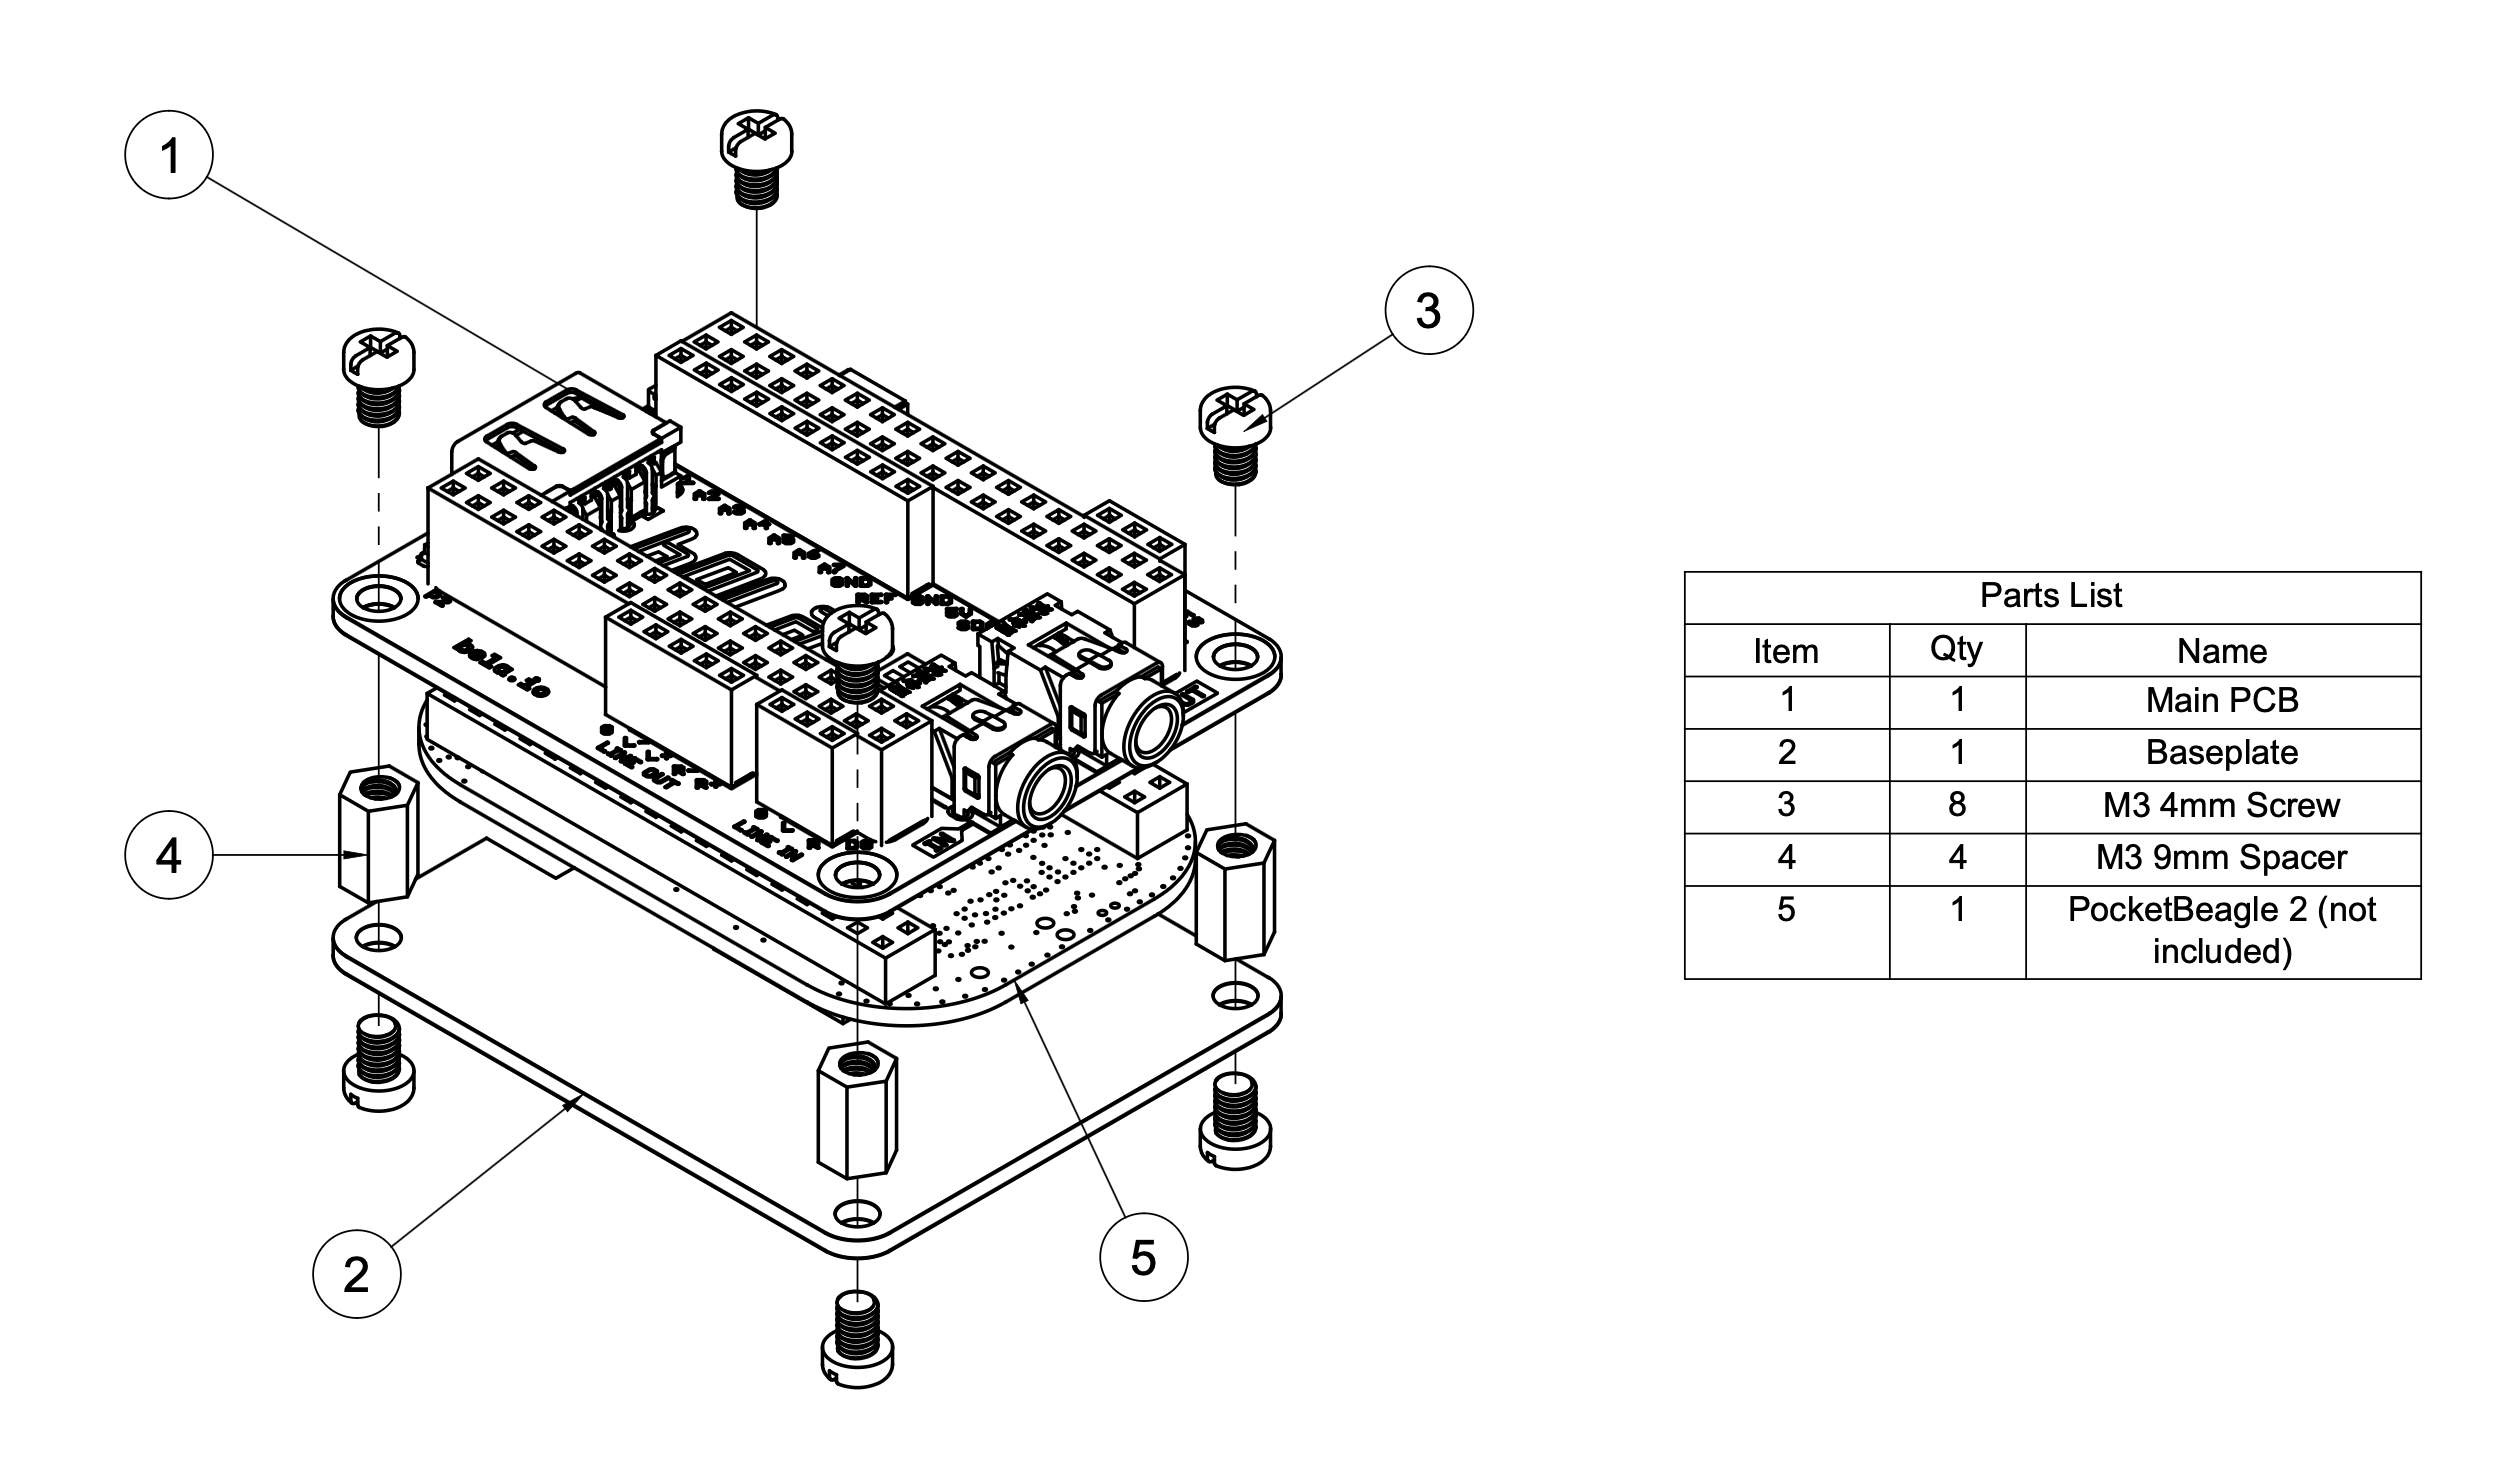
Bela Gem Stereo and Bela Gem Multi are Bela’s flagship embedded audio boards. To get started, you’ll need a PocketBeagle 2 (PB2) and a microSD card (16 GB or larger).
First, flash your microSD card with the latest Bela Gem software (see the SD card flashing guide). Insert the card into the PB2.
Next, mount the PB2 onto the Bela Gem board. Align the headers so the USB ports are on the same edge, then press the boards together evenly.
Finally, attach the baseplate and spacers as shown below.
Bela
If you have a Bela Starter Kit that you bought from us then you have everything you need in terms of hardware. There’s no need for an SD card.
If you only bought the Bela cape from us you will need to source a Beaglebone Black, attach the Bela cape and make sure you have a micro SD card flashed with the latest Bela software.
Bela Mini
If you have a Bela Mini Starter Kit that you bought from us then you have everything you need in terms of hardware; just insert the included SD card.
If you bought a Bela Mini cape then you will need to source a PocketBeagle, solder on the Bela Mini cape and make sure you have a micro SD card flashed with the latest Bela software.
Step 2: Plugging in
Once assembled, connect your Bela unit to your computer using the appropriate USB cable and wait for it to boot up. Bela takes about 40 seconds to boot, and when it’s ready the blue LEDs will blink in a heartbeat pattern. Connect headphones to the connector labelled OUT using one of the included audio adapter cables or directly to the board for Bela Gem.
Step 3: Load the IDE
Your computer recognises Bela as a USB network device. Most systems do this automatically when the board has the latest Bela image installed, while some older operating systems and/or Bela images may require drivers.
To check if your system is ready, open a web browser (we recommend Chrome) and go to http://bela.local. If you system is already configured, you’ll see this:
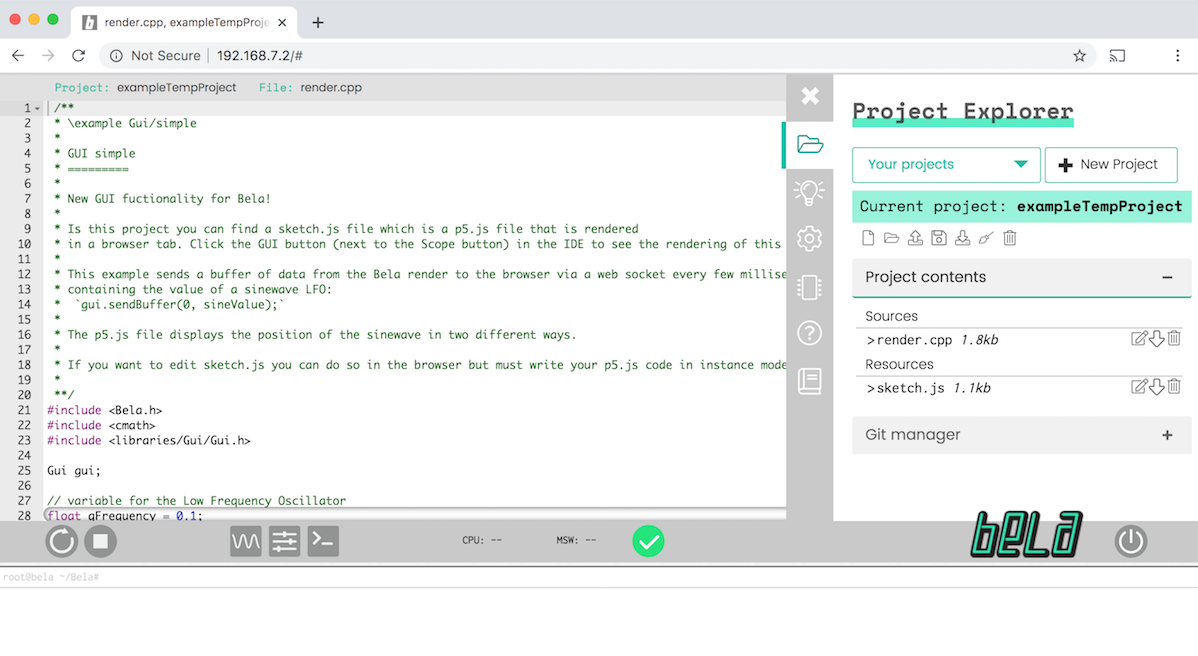
If the IDE doesn’t load, you may need a driver install or some additional network configuration. Click below to find instructions for your operating system:
Step 4: Build an example project
Once you have the IDE loaded, open the Examples tab. Click the example called sinetone. This opens an example project that will produce a 440Hz sine tone when you run it. You’ll see the code in the editor, as well as the project’s files in the Project Explorer tab.
In the toolbar on the lower half of the screen, click Run. If this is the first time you’ve built a project with your board it may take a minute or so to compile all the dependencies. This process only happens once.
When the Run button is spinning, your system is set up correctly and you should hear a tone coming from the audio output of Bela.