Programming Trill with Bela
Once you have your Trill sensors hooked up, you’re ready to start writing code to make them come to life.
This article explains how to start coding Trill in C++, as well as Pure Data with Bela.
Table of contents
Connect Trill to your Bela
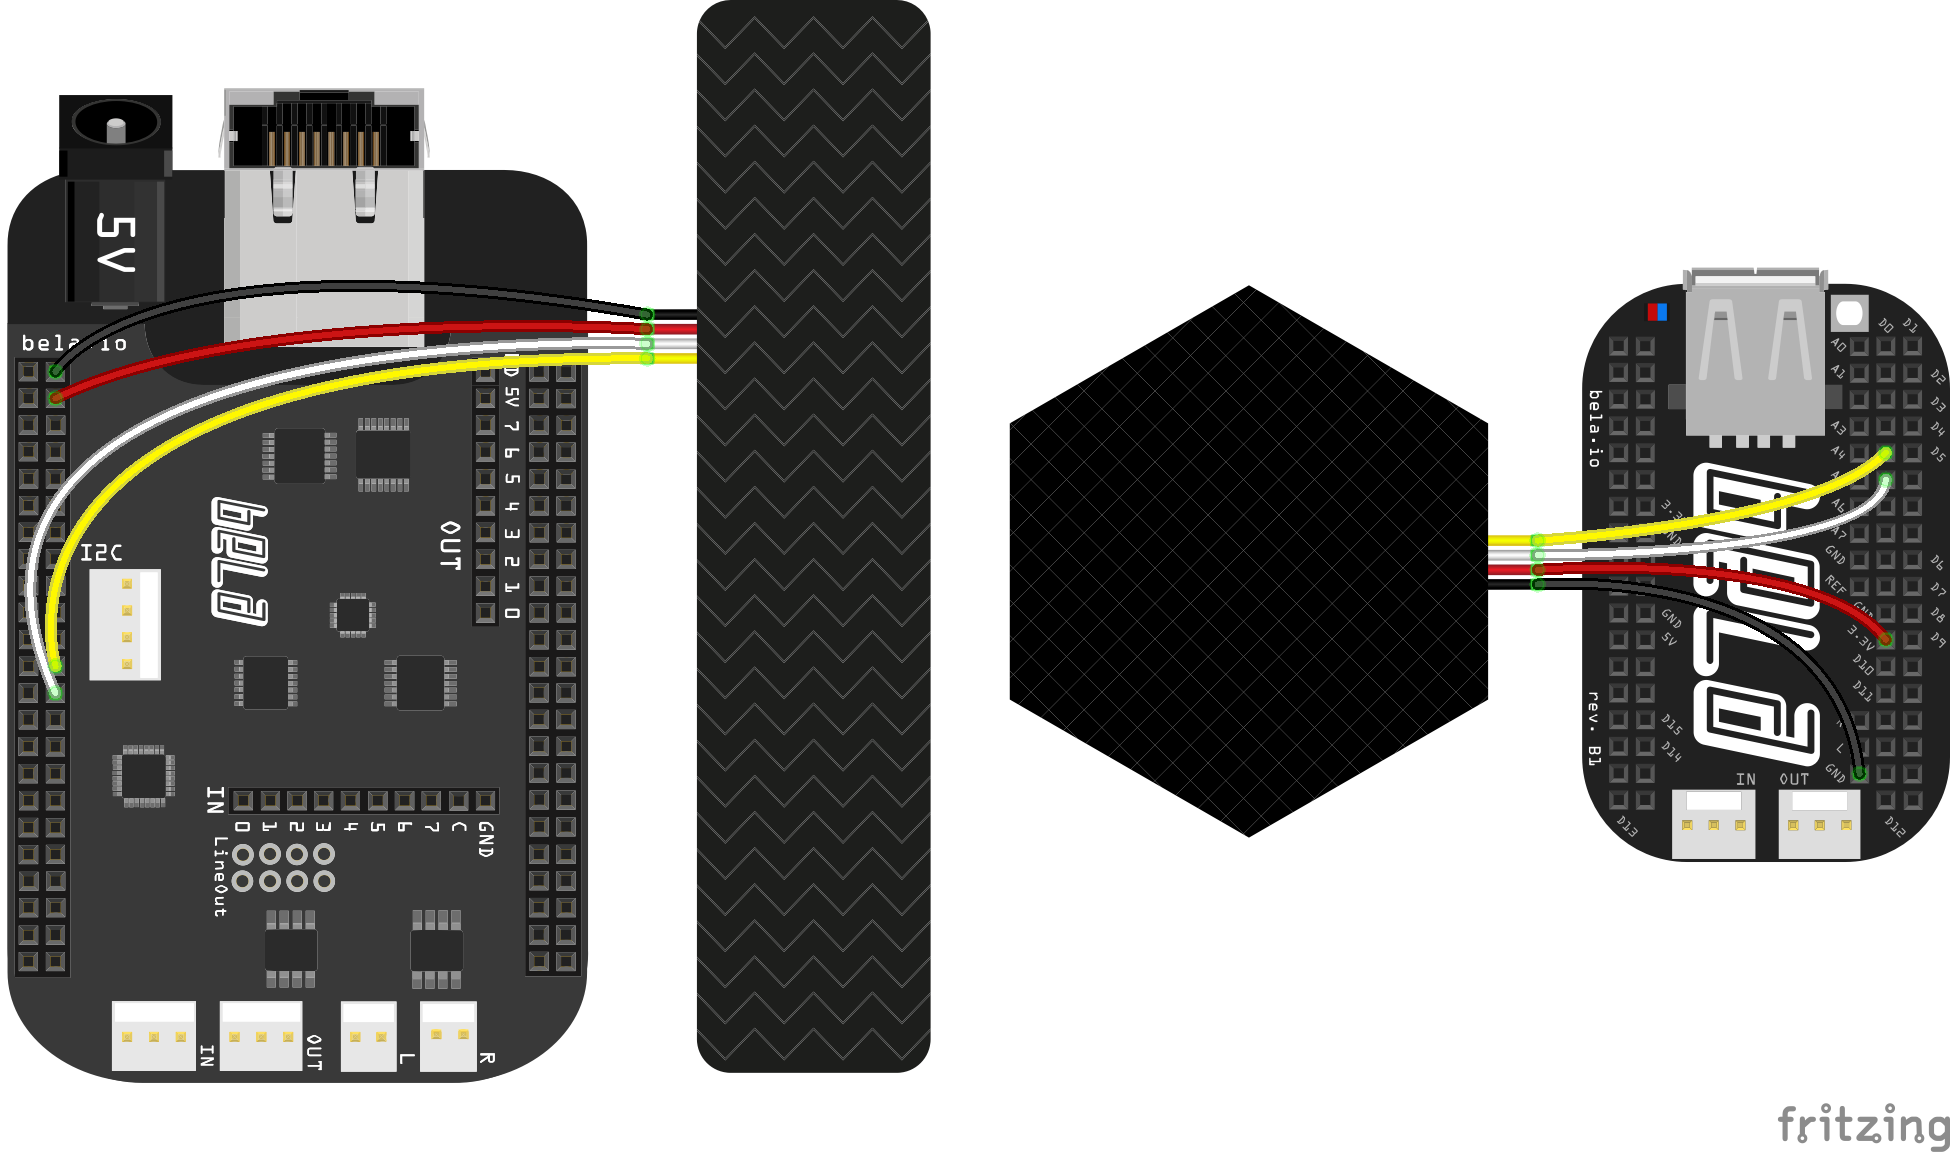
Both Bela and Bela Mini support I2C communication, and require a 3.3V supply. Locate the SDA, SCL, GND and 3.3V pins using the interactive diagram in the Pin Diagram tab in the Bela IDE, or use our online pin diagram.
Connect Trill’s SCL, SDA and GND pins to these pins on your Bela system, and connect Trill’s VCC to 3.3V. Here’s what the setup looks like for Bela and Bela Mini:
C++
The structure of a Trill project
This is an example of a bare-bones Trill project:
#include <Bela.h>
#include <libraries/Trill/Trill.h>

Trill touchSensor;

void loop(void*) {
	// This is the auxilary task function which will read our Trill sensors
	// loop
	while(!Bela_stopRequested())
	{
		// Read locations from Trill sensor
		touchSensor.readI2C();

		// Put the process to sleep when finished
		usleep(12000);
	}
}

bool setup(BelaContext *context, void *userData)
{
	if(touchSensor.setup(1, Trill::BAR) != 0) {
		fprintf(stderr, "Unable to initialise touch sensor\n");
		return false;
	}
	Bela_runAuxiliaryTask(loop);
}

void render(BelaContext *context, void *userData)
{
}

void cleanup(BelaContext *context, void *userData)
{
}
On the first two lines, we include the header files we need -Bela.h for the Bela API, and the Trill library. (The Trill library #include statement can be found in the
Libraries tab in the IDE.)
Then, we create a Trill object. You can give it any name you like, in this example we call it touchSensor.
Next is the loop() function, that will run the auxilary task. We’ll come back to this in a moment.
In the setup() function we set up the Trill sensor, and start the auxilary task. We’ll explain these in the next section.
The rest is like every other Bela project: our real-time code will go in the render() function, and cleanup() will clean up any allocated memory.
Setting up the Trill sensor
In the Bela setup() function we set up our Trill sensor:
	if(touchSensor.setup(1, Trill::BAR) != 0) {
		fprintf(stderr, "Unable to initialise touch sensor\n");
		return false;
	}
This initiates the sensor. If this initiation is successful, the function will return a 0. Therefore we check its return and if any other value is received, we print and error and don’t start because the sensor can’t be found.
Setup arguments
touchSensor.setup() requires a minimum of 2 arguments, but we can pass an additional, optional, one:
uint8_t i2c_bus_num
The number of the I2C bus. On Bela there are three I2C busses. You would normally be using bus 1, which corresponds to the the I2C pins highlighted in the pin diagram, so you would be passing 1 as the first argument. If you use a different bus, use the corresponding number here.
Trill:SENSOR_NAME
Specify the type of Trill sensor you’re using. The options are Trill::BAR, Trill::SQUARE, Trill::CRAFT, Trill::HEX or Trill::RING.
int i2c_address
If you’ve changed the address of your sensor from the default with the process we describe here, you can customise the address with this argument. If not provided, the default address for the specified device type will be used instead.
Trill and auxillary tasks
After we set up the sensor in the setup() function, we then start an auxillary task to read it at regular intervals. An AuxiliaryTask is thread of execution that is managed by the Bela backend, separate from the audio thread (which runs the render() audio callback).
Why we use an auxiliary task
Bela is a real-time environment, where the render() function processes block of audio-rate frames thousands of times per second (2756 times per second by default, to be precise). This means that anything in the render() function must complete in a very small amount of time. As a matter of fact, the Bela architecture expects that the code in render() does not connect to an external device or perform expensive I/O or memory operations that require the Linux kernel. If these assumptions are fulfilled, and if the computations required by the code do not exceed the CPU capabilities of the board, Bela can then deliver reliable low-latency real-time performance. However, Trill communicates with Bela using I2C, and this is a relatively slow operation that uses the Linux kernel drivers and therefore can not be performed inside render(). For this reason, we perform the communication with the Trill device in an auxiliary task, which does not have the strict real-time requirements of the audio thread.
Creating the auxiliary task
We create and start the aux task in the setup() function. The simplest way to do this is:
Bela_runAuxiliaryTask(loop);
loop is the name of the function that is called in the auxiliary task. For this reason, the content of the loop() function determines what the aux task does.
Defining the auxiliary task
We determine precisely what the aux task does in the loop() function. (For examples of how this might be done, check out any C++ Trill example in the
Examples tab.)
The important thing to note is that what happens takes place inside a while loop:
	while(!Bela_stopRequested())
	{
		// Read locations from Trill sensor
		touchSensor.readI2C();

		// Put the process to sleep when finished
		usleep(12000);
	}
Bela_stopRequested() will return true when the program should stop. It is therefore important that the task checks its return value at regular intervals and that it concludes its execution if the program should stop.
Also note that the aux task contains a usleep() function. This puts the task to “sleep” - or stops it from running - for a specified number of microseconds. The length of time the aux task takes to execute plus the length of usleep() will determine how often the while() loop runs, and in turn how often the device is scanned. A smaller value will potentially allow your thread to run more often, and your Trill sensor to be scanned more often, but very small values could have negative impact on the overall performance of the system. Keep in mind that a cycle of scanning on a Trill device takes about 7ms with the default scan settings, so it is often pointless to read more often than that. For this reason, we suggest a minimum sleep of at least 6ms (usleep(6000)).
Pure Data
We have made it as easy as possible to get started with Pure Data and Trill. Each sensor type comes with a dedicated Pure Data example which demonstrates how best to interface with that sensor which can be found in the Examples tab of the Bela IDE.
Initialising the sensors
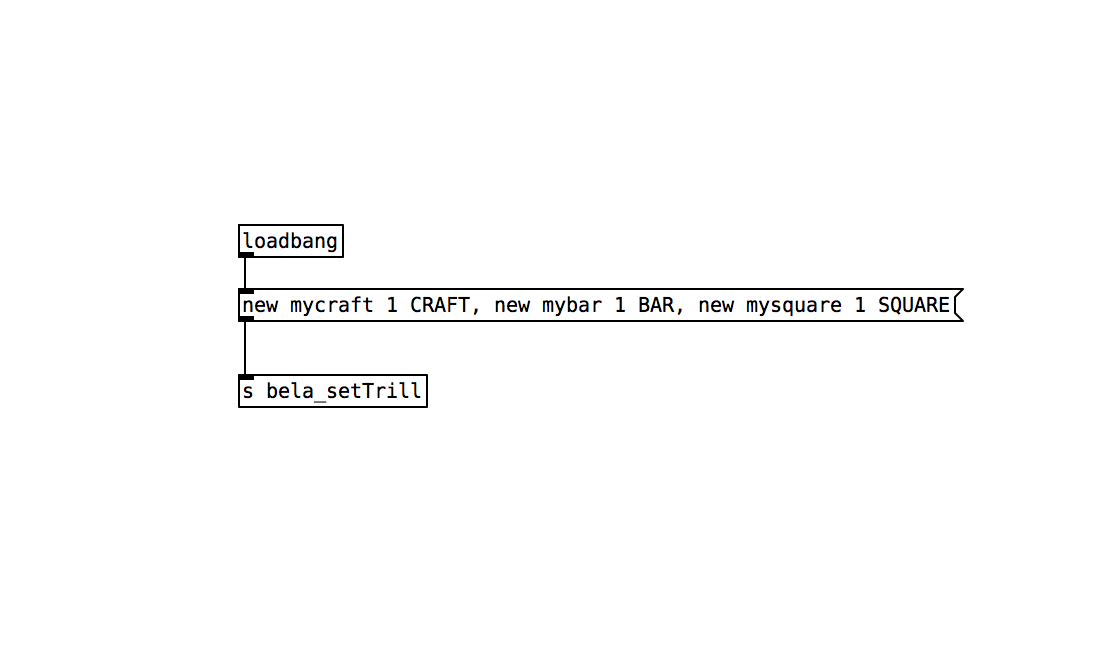
The initialisation of Trill sensors happen by passing a message with the following structure to [s bela_setTrill] upon loading the patch.
Minimum required message: [new <sensor_id> <bus> <device>]

Additional parameters: <mode> <address>
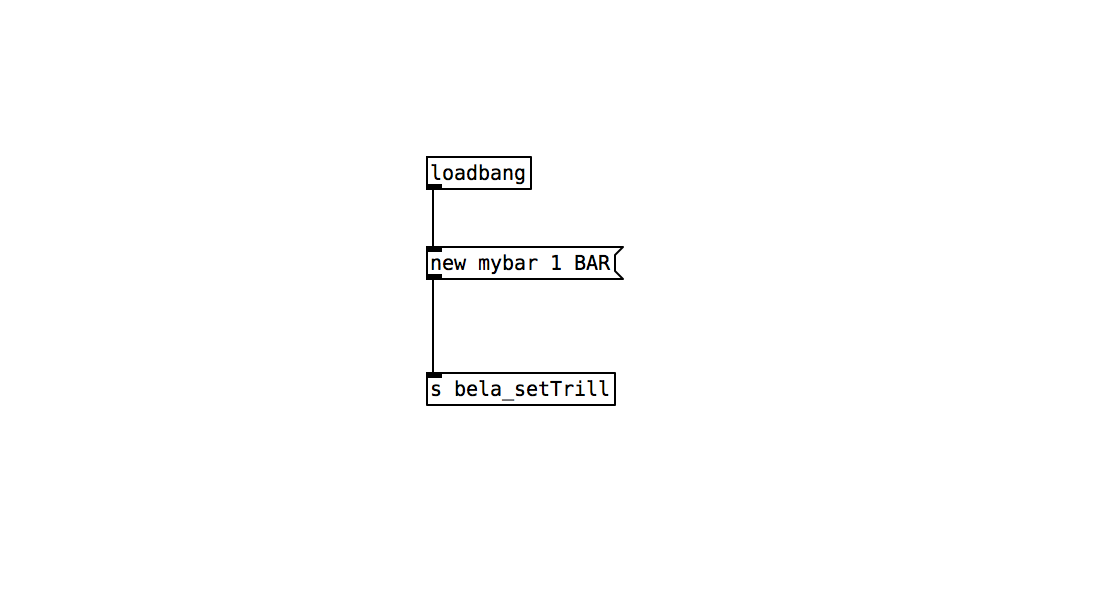
<sensor_id>is a unique identifier that you can use to name your sensor.<bus>is the i2c bus that your sensor is connected to (normally 1 on Bela).<device>is the type of sensor you are connecting: BAR SQUARE CRAFT RING HEX.<mode>is the behaviour of the sensor and can be one of AUTO, CENTROID. RAW, BASELINE or DIFF. When set to AUTO the sensor will be initialised with the default mode for the sensor type.<address>is the address of the sensor. If unspecified, the default address for the sensor type will be used
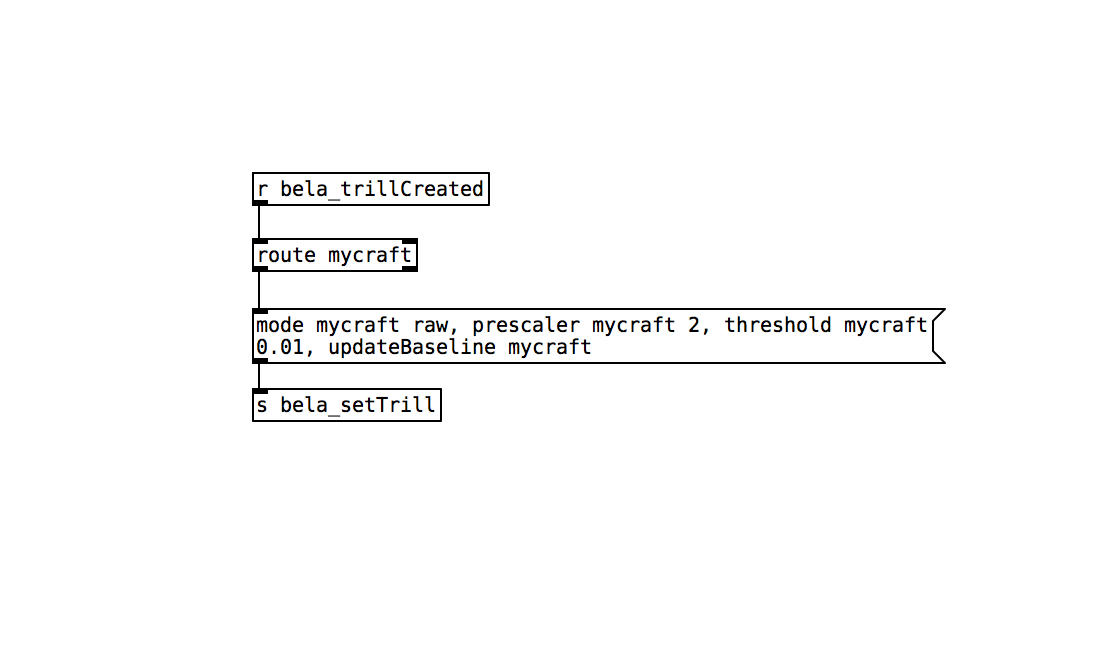
You can also check whether the sensor was initialised correctly by looking at the output of [r bela_trillCreated] which will receive a message for every Trill sensor which has been successfully initialised. The message will contain: <sensor_id> <device> <address> <mode>.
Reading from the sensors
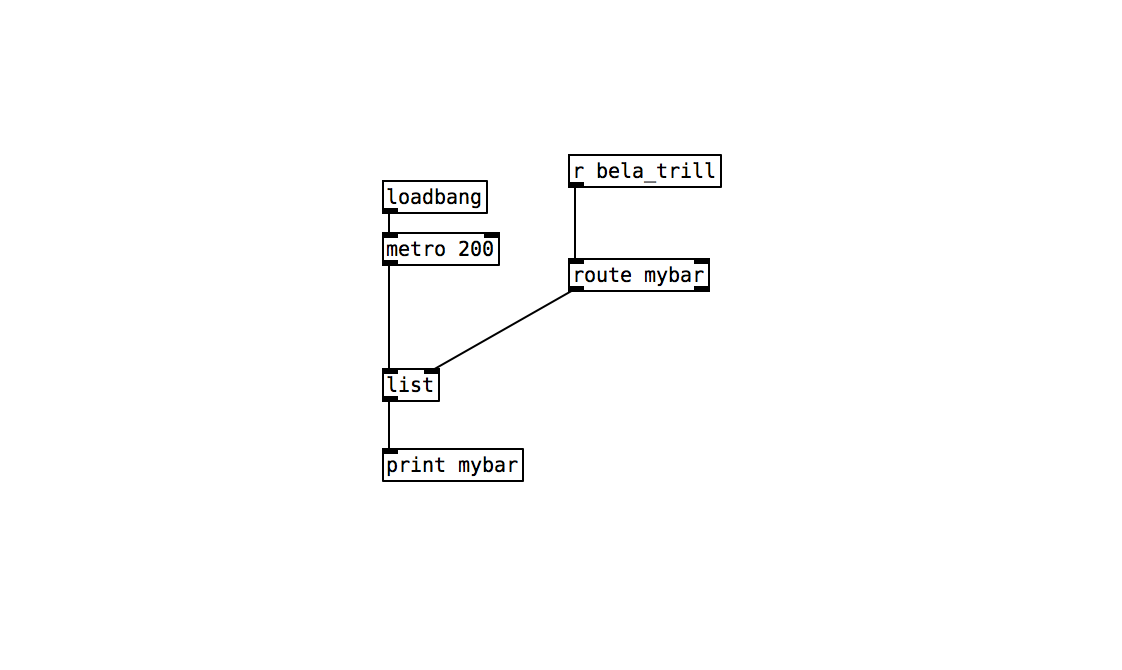
The reading from the sensor is received through the [r bela_trill]. The data stream will be prepended with the sensor_id that was given to each sensor in the stage above. The data is formatted as a list with the following items:
- Bar, Ring in CENTROID mode:
[<num_touches> <position> <size>] - Square, Hex in CENTROID mode:
[<num_touches> <x> <y> <size>] - Craft or any sensor in RAW, DIFF or BASELINE mode:
[<num_channels> <values .... >]
Changing sensor settings
Settings can be updated upon initialisation or while a patch is running by sending messages to [s bela_setTrill]. A full description of the settings and what they mean can be found on the integrating Trill into your projects page.
- Device mode can be set to AUTO, CENTROID. RAW, BASELINE or DIFF. When set to AUTO the sensor will be initialised with the default mode for the sensor type.
[mode <sensor_id> <mode>] - Prescaler can be set:
[prescaler <sensor_id> <value>]is between 1 and 8. - Threshold can be set:
[threshold <sensor_id> <value>]is between 0 and 0.1. - Reset the baseline:
[updateBaseline <sensor_id>]
Connecting multiple sensors
You can use multiple Trill sensors together so long as they have different addresses (see the all about i2c page for a full discussion of Trill addresses). Simply initialise each of the sensors in the same way as discussed in the above section, separated by a comma.
When reading the data from [r bela_trill] each sensor will be prepended by its unique identifier and so it is possible to split up the reading with a [route] object as follows:
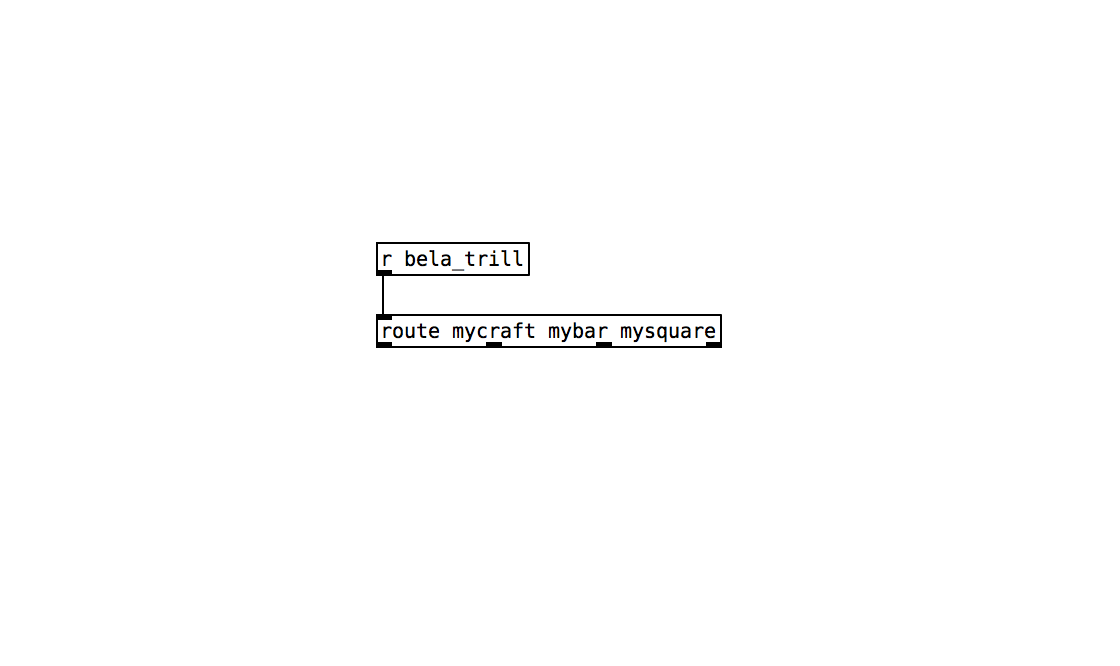
See the example general-pd for a working project that reads from multiple Trill sensors at once.