The pin diagram
A quick way to see what goes where
We developed the pin diagram in direct response to being fed up trying to remember where to plug things in. The pin diagram is integrated into the Pin Diagram tab of the Bela IDE.
This page explains the pin diagram amd its functionality.
Table of contents
The pin diagram - hassle-free connections
We made the pin diagram to make it a breeze to see what each pin on your Bela system does and where to plug things in.
Plugging things in is a big part of physical computing, and it’s important to plug things in correctly - we’ve all lost a few boards and devices because we didn’t know that something was connected to the wrong pin when we turned on the power. This causes a lot of anxiety, especially when working to a deadline, or with a more expensive system.
The pin diagram eliminates the need for websites, print outs or diagrams in order to be confident about where to connect things, freeing up your attention for creating beautiful things with Bela.
How to use the pin diagram
The pin diagram is found in the Pin Diagram tab in the IDE. When you plug in your Bela system, the IDE detects which board you’re using and loads this board into the pin diagram.
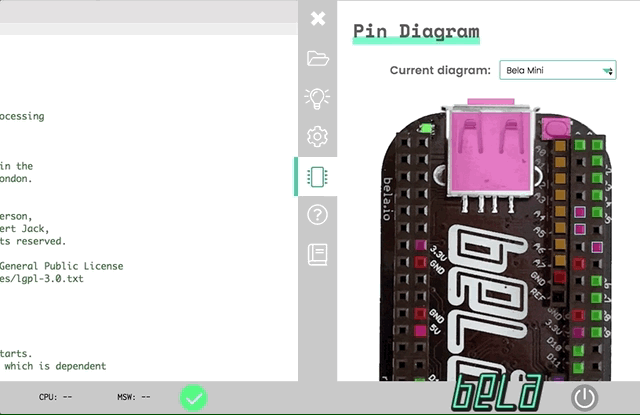
The diagram highlights the pins available in coloured squares. Hover over a highlight to see a description of the pin’s function.
As well as embedding the pin diagram in the Bela IDE, we also have a version hosted at this website for quick reference at learn.bela.io/pin-diagram.