Your projects and files
Bela programs - or projects - are stored con your Bela system. As you develop a project you’ll want to add things, like new code files, or assets like audio files.
This article goes through how to handle your projects and the files in them.
Table of contents
- The Project Explorer
- Create a new project
- Manage a project
- Manage a project’s files
- Switch between projects
The Project Explorer
The top tab in the Tabs is the Project Explorer . This is where you can create new projects, as well as switch between the projects on your Bela system. It’s also where you manage the files in the project you have open.
Create a new project
The process for creating a new project is the same for projects in C++, Pure Data, SuperCollider and Csound.
1. Create the project
At the top of the
Project Explorer tab, click the New Project button. You’ll get this dialog box:
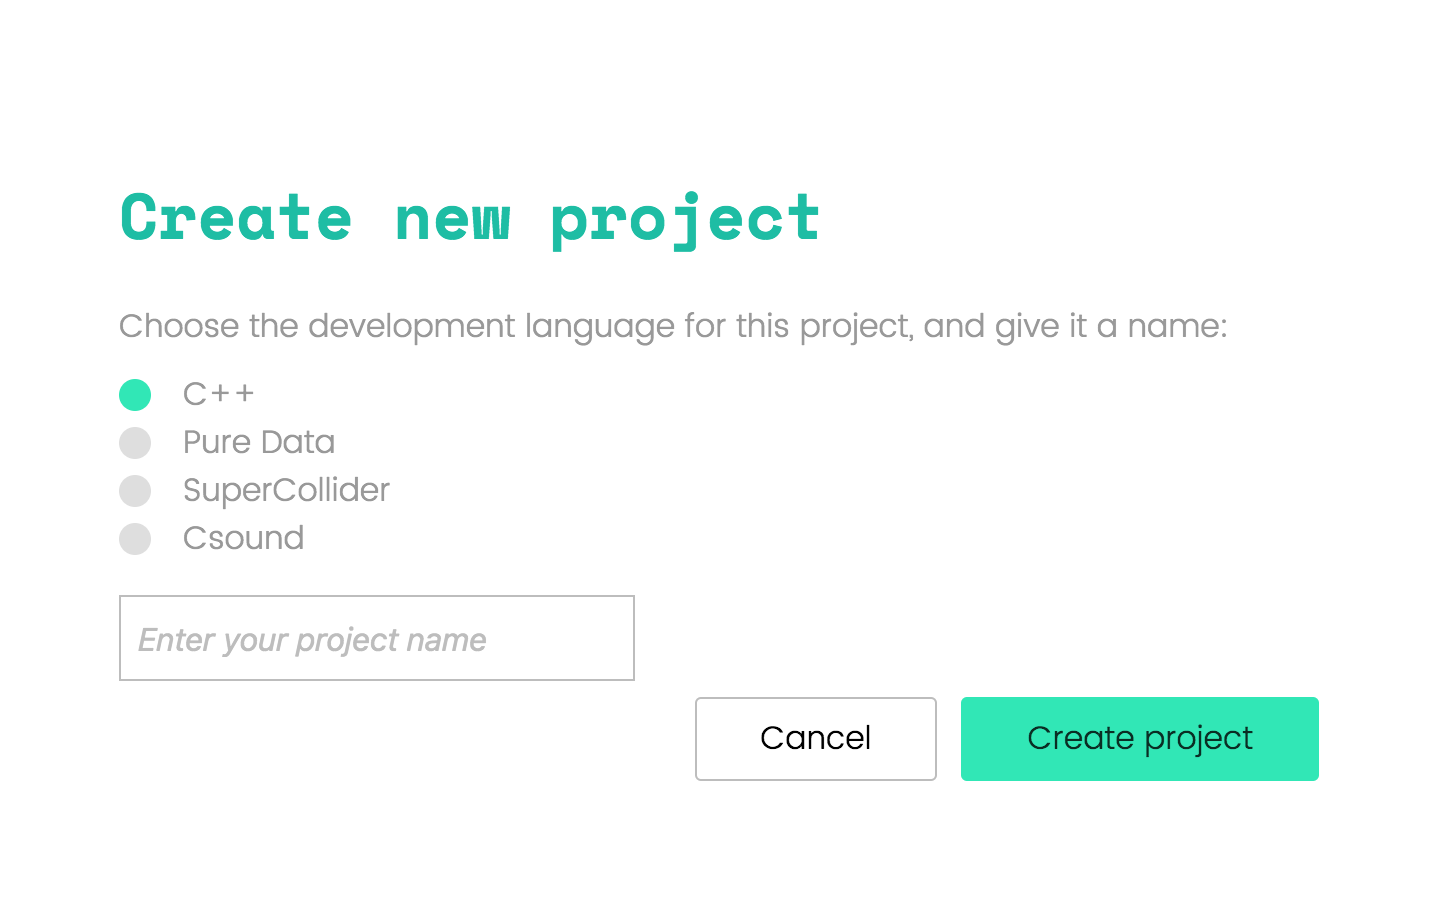
2. Specify your project’s language, and give it a name
In the dialog, click on the button beside your desired language, and type a project name into the text box. Click Create project.
This creates your project with a basic root file, and automatically opens it in the Editor. You can start editing and running it right away.
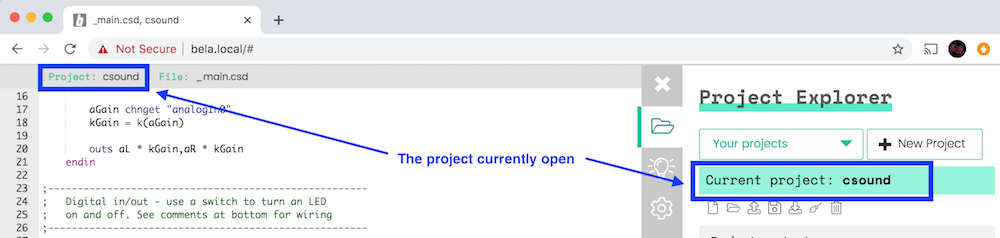
Manage a project
The Bela IDE supports one open project at a time. The name of the project that’s currently open is displayed in two places: At the top of the Editor window, and at the top of the Project Explorer tab:
Immmediately under the project name in the Project Explorer are the project controls:
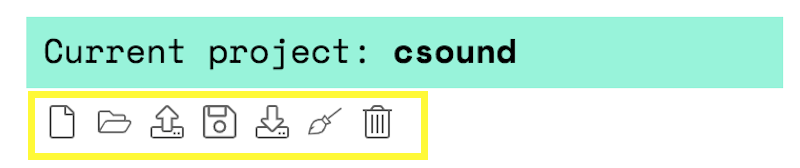
From left to right these are:
- Create new file: Allows you to add a new file to your project. This file can be any kind of text file (
.cpp,.h,.scd,.txt, and so on), and you’ll be able to edit it in the text editor. - Create new folder: To keep things tidy you can create subfolders to keep your project files organised.
- Upload file: This allows you to add a file from your computer to your project.
- Save project as … This creates a copy of your project and lets you give it another name.
- Download project: Click to download your current project and all its assets in a ZIP file.
- Clean project: This refreshes the project and forces the IDE to build it from scratch the next time it runs. This can solve caching and memory issues.
- Delete project: Click to delete this project and all its assets. (There is no undo.)
Manage a project’s files
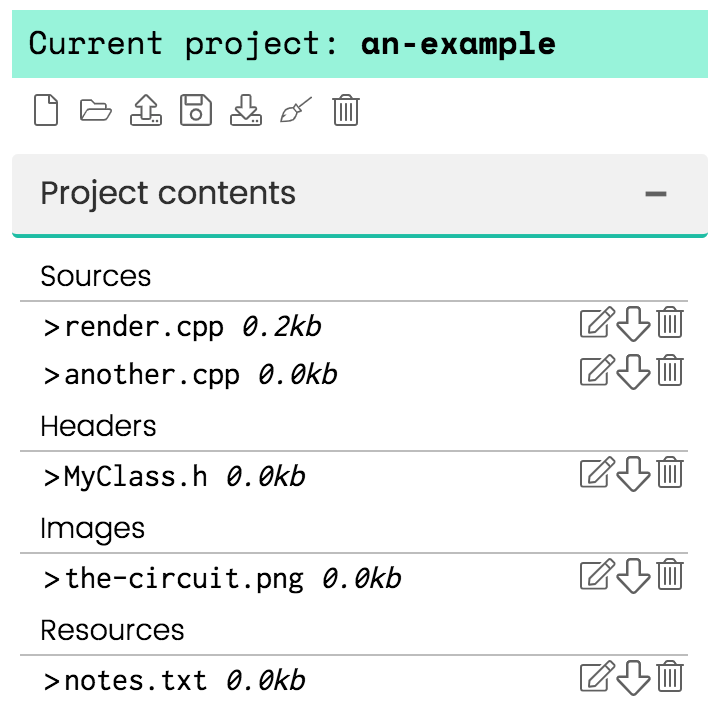
Below the project controls is the list of Project Contents. This lists all the files in your project, as well as any directories:
File contents
The files in your project are automatically grouped under headings when they’re created or uploaded:
- Sources:
.cppand.cfiles - Headers:
.hand.hppfiles - Abstractions: Extra
.pdfiles are not_main.pd - Images:
.jpgor.pngfiles (useful for documenting circuits you’ve built!) - Directories: Any sub-folders you’ve created
- Resources: Any other type of file
These headings are not subdirectories, and don’t have any function - they just group your files under headings so your project files are easier to navigate.
File controls
Beside each file and directory listed in your Project Contents are some File Controls:
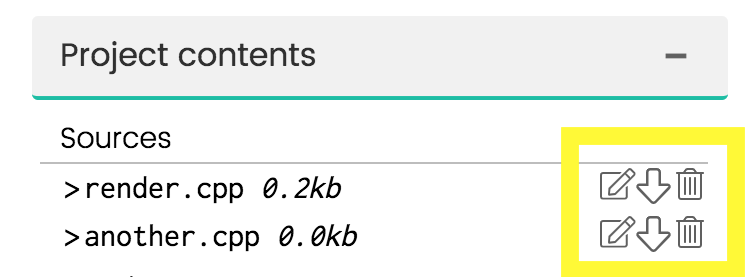
From left to right, these are:
- Rename: Click to rename the file. If you change its extension the Editor may interpret it differently, or place it under a different heading.
- Download file: Click to download a single file (will not be in a ZIP file)
- Delete file: Click to delete this file. (There is no undo.)
Switch between projects
At the top of the
Project Explorer is a dropdown menu labelled Your Projects. Click to see a list of all the projects on your Bela system. Clicking on one closes the current project, and opens the selected one:
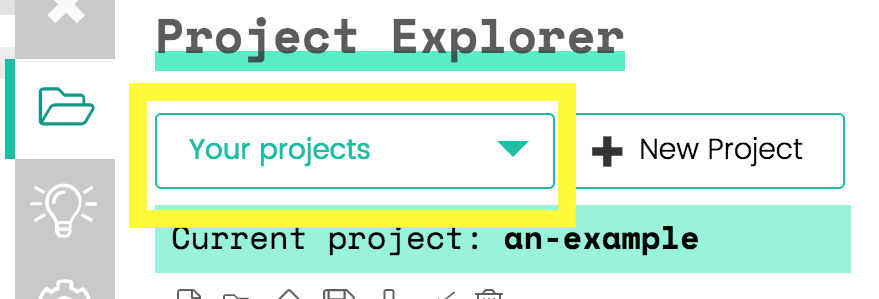
Because your code, files and assets are automatically saved as you work, you will never lose anything by closing one of your projects and opening another. If you make changes to a built-in example, the IDE will prompt you to save your changes to a new project before closing it.