Bela Mini
The best of Bela, just smaller
Bela Mini has all the most popular features of Bela in a tiny package. With a smaller form factor Bela Mini has made it possible to embed high-performance computing into more places than ever before.
Table of contents
Tech specs
Thanks to the power and design of the PocketBeagle, Bela Mini has the same level low-latency performance as Bela. It’s also fully compatible with the Bela software, including our browser-based IDE.
Bela Mini has the following hardware features:
- Stereo audio I/O
- 8 x 16-bit analog inputs
- 16 x digital I/O
- Tiny footprint (56 x 35 x 21mm)
Bela vs Bela Mini
The assembled Bela Mini system has most, but not all of the features of Bela. See below:
| Feature | Bela Mini | Bela |
|---|---|---|
| Audio Inputs | 2 | 2 |
| Audio Outputs | 2 | 2 |
| 16-bit Analog Inputs | 8 | 8 |
| 16-bit Analog Outputs | - | 8 |
| Powered speaker outputs | - | 2 |
| Digital I/O | 16 | 16 |
| UART serial | yes | yes |
| I2C bus | yes | yes |
| SPI bus | yes | yes (soft) |
| Ethernet | - | 1 |
| Dimensions (L x W x H) | 56 x 35 x 21mm | 87 x 54 x 27mm |
| eMMC (onboard memory) | None; SD card only | 4GB |
Both Bela and Bela Mini also have audio line out (on Bela these are unsoldered pads, while on Bela Mini these are connected to pin headers). On the Bela Mini this line out is unbalanced, meaning noise performance is better on Bela than on Bela Mini. Please note that this refers only to the line out audio, and not the stereo I/O; the stereo outputs on Bela and Bela Mini are functionally identical.
Compatibility
Bela Mini is fully compatible with the Bela software. This means that if you have an existing project you’ve developed with Bela, you can use that same project on Bela Mini. This can be as easy as removing the SD card from Bela and inserting it in Bela Mini, or uploading the project to Bela Mini from your computer. Of course, there are some exceptions to this; for example if your Bela project uses analog outputs you can’t use it with Bela Mini because it doesn’t have analog outputs. However, the operating system and processing capabilities are identical, and there is no difference between developing projects on Bela and developing projects on Bela Mini.
The Bela Mini Multichannel Expander is an add-on board for Bela Mini. When combined with Bela Mini it expands the audio input and output channels from 2 to 8.
Bela Mini Starter Kit
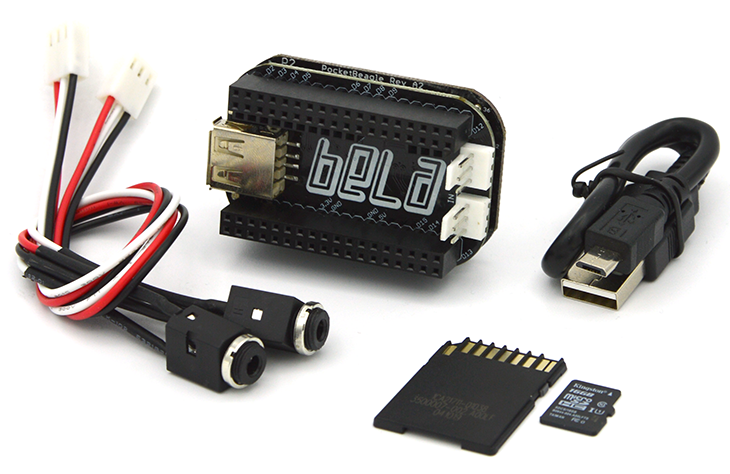
The Bela Mini Starter Kit has everything you need to start building interactive projects with Bela Mini. It includes:
- An assembled Bela Mini unit (PocketBeagle and Bela Mini cape soldered together)
- 1 USB cable
- 2 audio adapter cables
- 1 16GB SD card flashed with Bela software
Bela Mini assembly
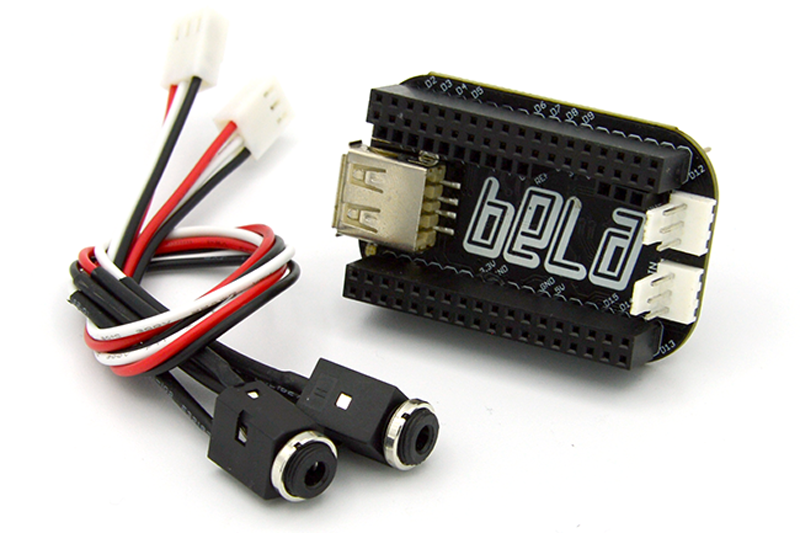
We sell Bela Mini as a cape-only product for those who already have a PocketBeagle and would like to put it together themselves. The cape comes with 2 audio adapter cables but does not include a USB cable or SD card.
Please note that you’ll have to solder the Bela Mini cape to your PocketBeagle, and the soldering has to be very precise. If you’re not very confident with soldering, a Bela Mini Starter Kit is a better option. Incorrect soldering can damage both the PocketBeagle and the Bela Mini cape.
If you’re happy to wield a soldering iron, here’s how to assemble your Bela Mini unit:
1. What you’ll need
- PocketBeagle
- Bela Mini cape
- A good quality soldering iron with good quality solder
2. Line up the PocketBeagle and Bela Mini cape.
On your PocketBeagle, locate the micro USB connector on one side and the SD card slot on the other. On your Bela Mini cape, locate the USB host port on one side and your audio input and output connectors on the other:
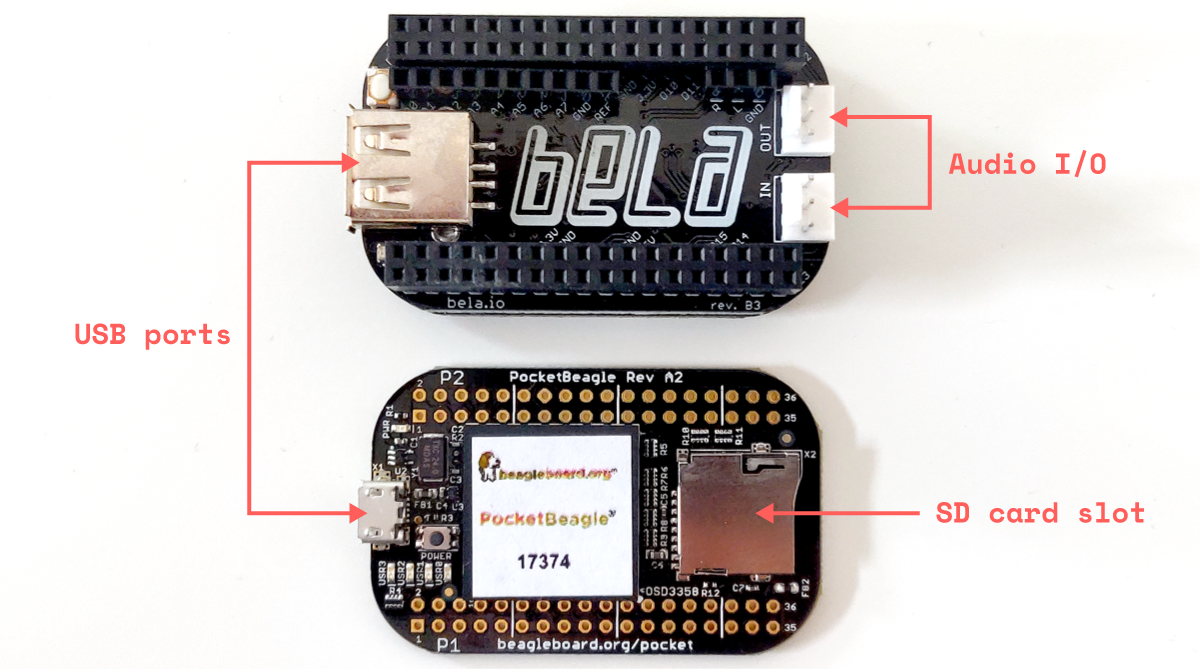
Place your Bela Mini on top of the PocketBeagle, with the USB connectors aligned on one side, and the audio input and output connectors and SD card slot aligned on the other.
Double check and make sure the orientation of your Bela Mini cape and PocketBeagle are correct before you start soldering. If you have them backwards you will damage both the Bela Mini cape and PocketBeagle!
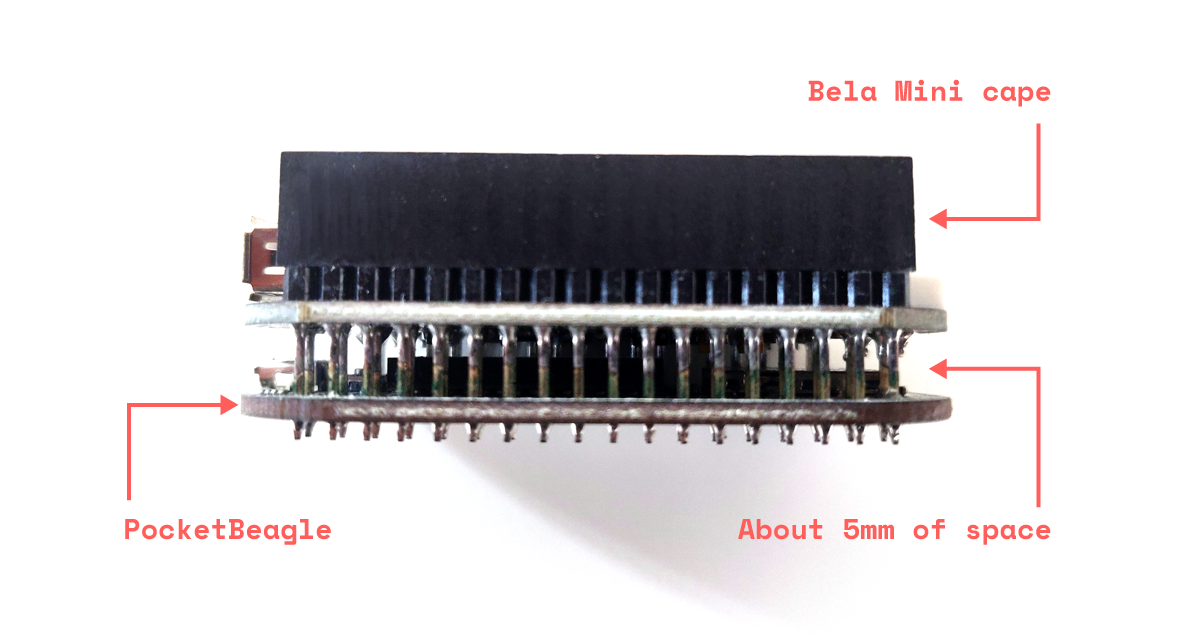
3. Leave a gap between the PocketBeagle and the Bela Mini cape.
When soldering the PocketBeagle and the cape together, it’s important to leave a gap between them because access to the SD card slot is essential for your system to function. A gap of about 5mm is ideal - this will leave room to access your SD card, and also means you won’t need to trim any pins when you’re finished.
Developing Bela Mini
Bela Mini was a direct response to the introduction of the PocketBeagle open-source computer. Bela debuted as a commercial product in 2016, and though Bela was already compact we were excited about how an even smaller form factor could be embedded in even more places while still offering the same low-latency, high-performance computing. In February 2018, we released Bela Mini.
Bela Mini is open-source hardware, meaning that the code as well as the hardware designs are freely available for you to look at, learn from, and modify. We are proud that, along with Bela, Bela Mini is a BeagleBoard Approved product.