RNBO
RNBO is a new tool from Cycling 74 which allows you to export your Max/MSP patches into various different formats. You can now deploy Max-like patches to hardware and software targets like Raspberry Pi, VST and Audio Unit plugins. You can also export to C++ and JavaScript code for use in custom desktop applications and Web Audio contexts.
Integration of RNBO and Bela is now fully working but under active development so this page will be updated regularly with the latest developments and bugfixes.
Table of contents
- Taking Max patches into the wild
- Running a RNBO project on Bela
- Parameter control from Bela’s hardware
- Loading presets
Taking Max patches into the wild
Here’s an introduction to RNBO from Cycling 74 for those of you who are unfamiliar with it.
Note that we are using RNBO version 1.2.6 in this guide.
Running a RNBO project on Bela
Running a RNBO project on Bela is simple:
Step 1: add custom project to Bela
To begin download this repo as a .zip file. To download from Github click the green Code button and then select Download ZIP. Make sure your Bela board is connected and then add this project to Bela by simply dragging and dropping the .zip file on the IDE window.

Upon creating the new c++ project you will see an error in the console: 'RNBO.h' file not found column: 10, line: 2. This error will disappear after you build the project for the first time so can be ignored.
Step 2: export c++ code from Max / RNBO
We now need to generate c++ code from within the Max software. A good source of examples which run on Bela can be found in the RNBO Guitar Pedals Package. From within one of these patches double click on the [rnbo~] object to open the RNBO patcher (similar to Max but with objects outlined in blue). On the righthand side menu you will see an icon of a document to Show Export Sidebar. Click to open the below:
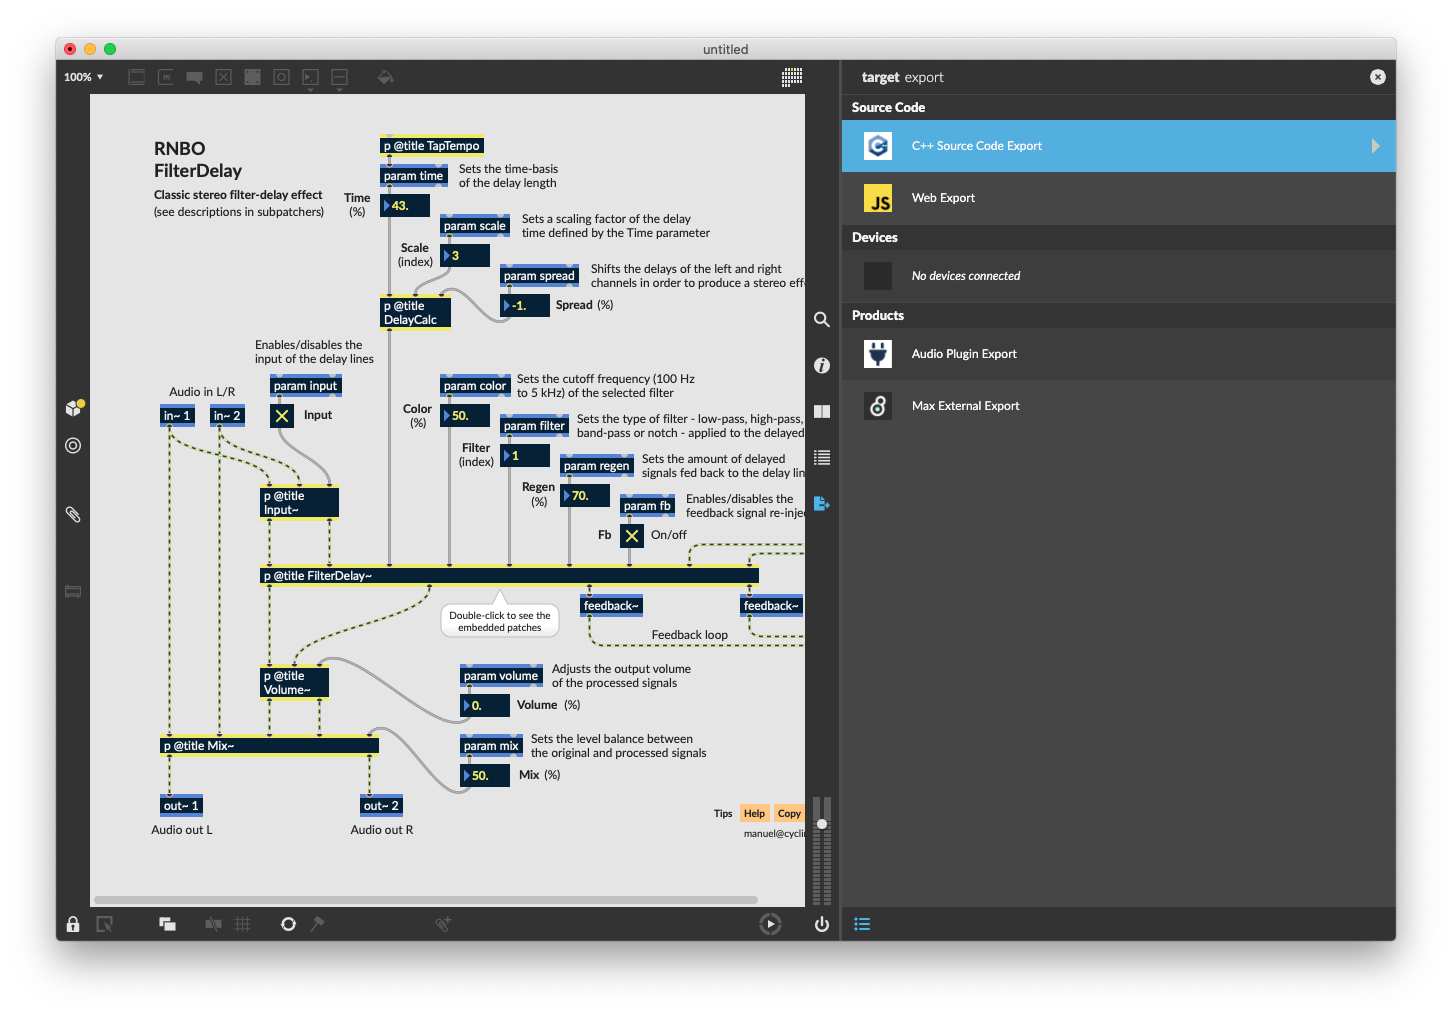
The first of the options is the one we want: C++ Source Code Export. The next window has various export options. We will leave them as default aside from defining the Output Directory.
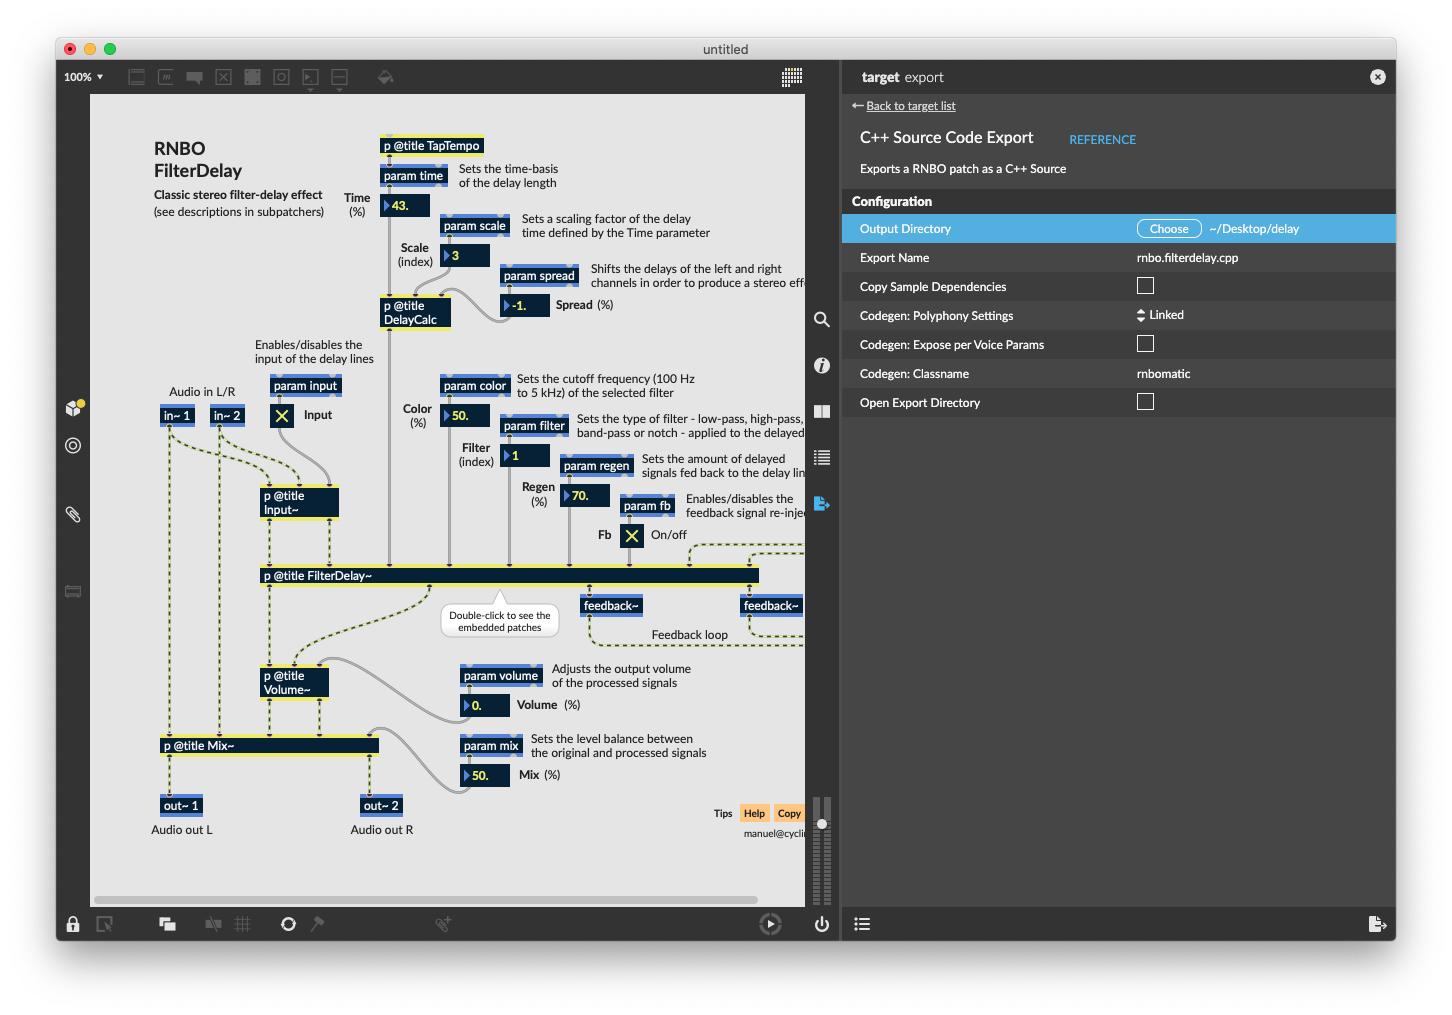
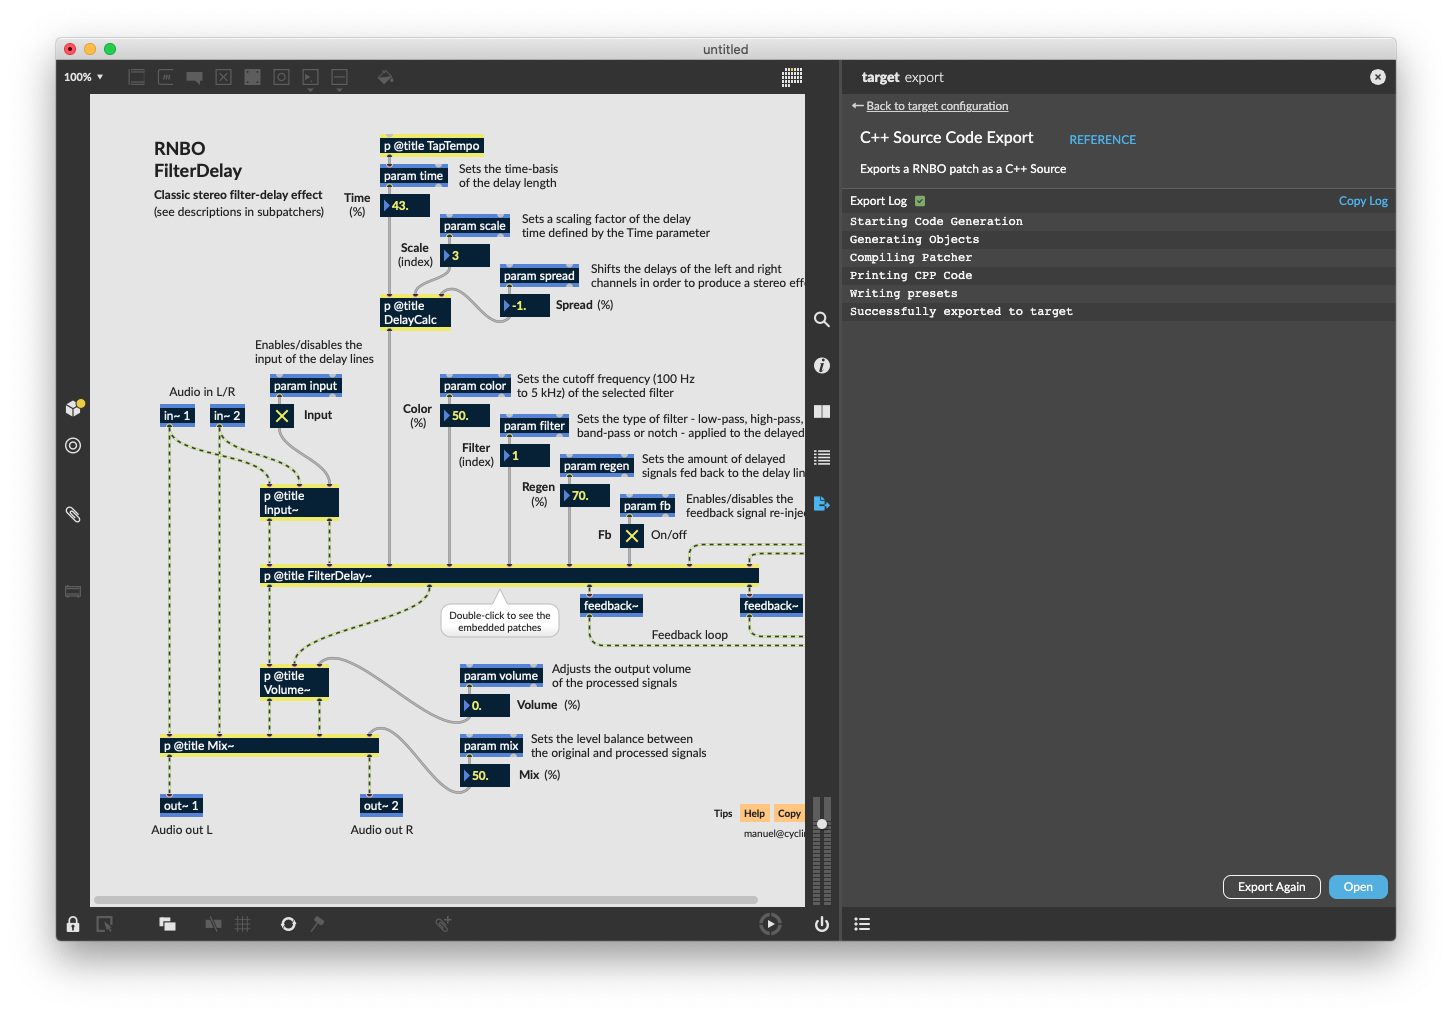
Click Export to Selected Target in the bottom right to generate the files.
The important files from the export are:
- the rnbo main source file. This is called by default
rnbo_source.cpp, but this may be overridden with the field “Export name” presets.jsonwhich is used for storing presets (see further down the page).
Step 3: copy generated code to Bela
Copy the rnbo main source file from the generated code to your project in the Bela IDE and build the project. At any time you should have exactly one rnbo main source file in the project, so if the rnbo main source file you are importing has a different name from the one that was already there, remove the latter. If you have no rnbo main source file in your project you will probably get an undefined reference error at build time. If you have multiple of them, you’ll get a multiple defined error at build time.
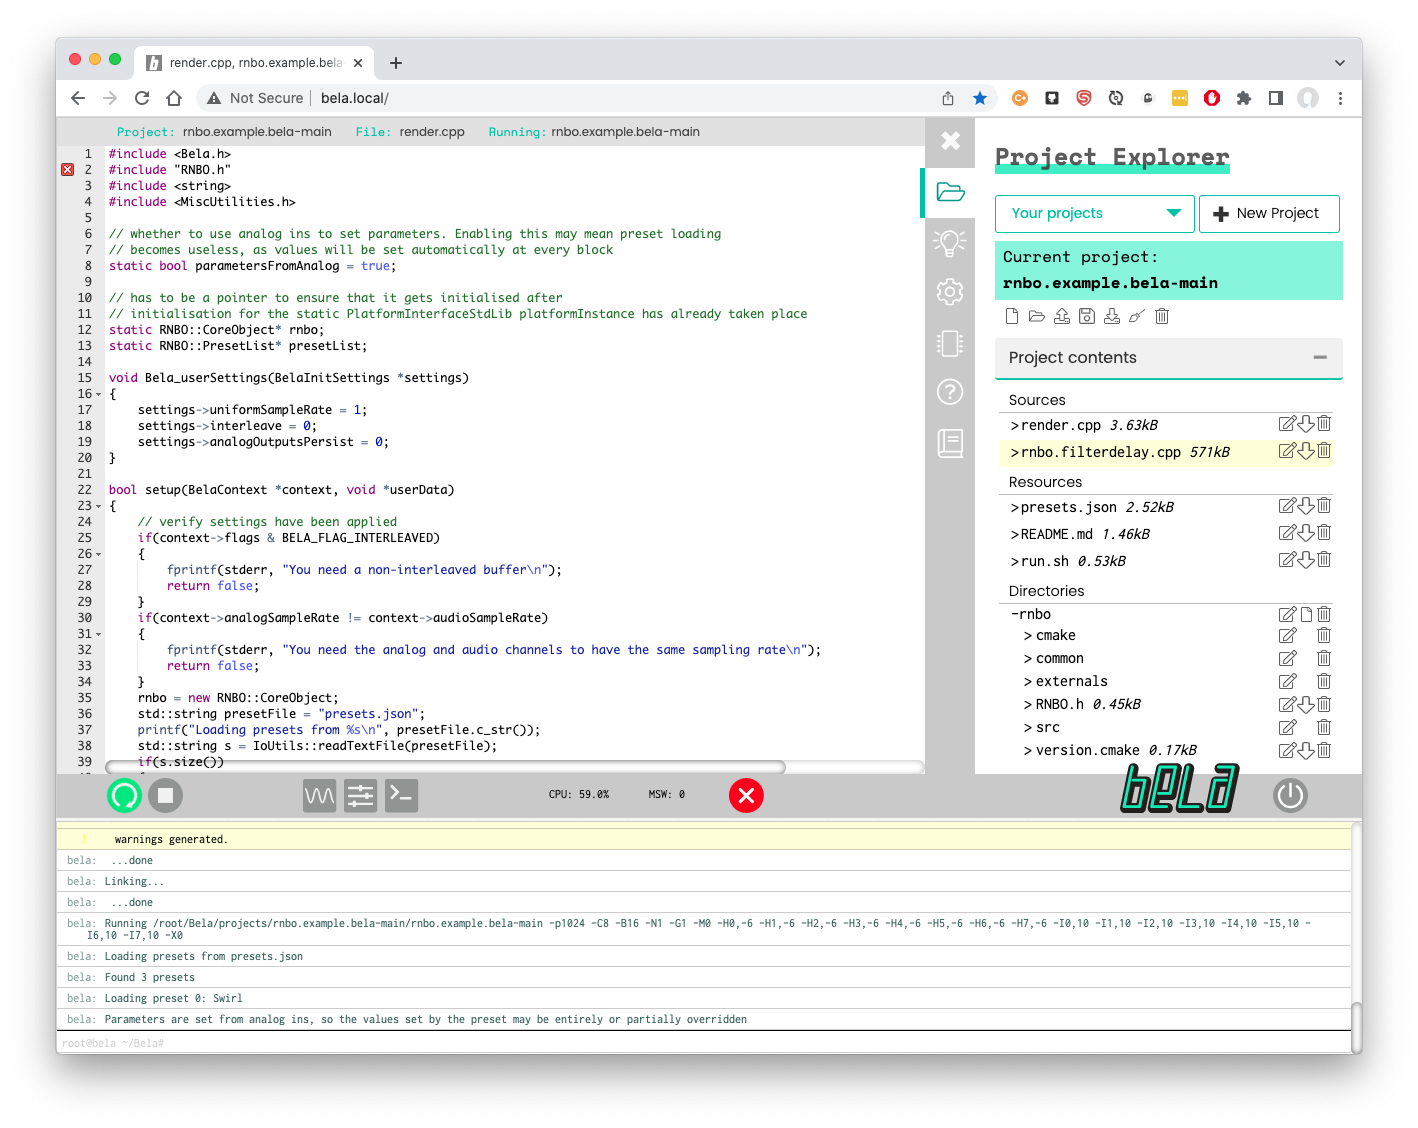
Click the Run button to build the project. This will take a good few minutes the first time you do it but will be much quicker on subsequent builds.
There will be some warnings printed to the console while building but these can be ignored for now: we’re working on cutting them down.
Parameter control from Bela’s hardware
Viewing the available parameters
When you run your project you will see printed to the console a list of the available parameters you can control in your RNBO patch. Below is an example of the parameters printed to the console.
60 parameters available:
[0] input
[1] time
[2] scale
[3] color
[4] volume
[5] mix
[6] spread
[7] filter
[8] regen
[9] fb
+ 50 hidden parameters
...
You can see that each parameter has an index in the square brackets at the beginning. The first items on the list are from any [param] objects in your patch, which are the most immediately useful for controlling your patch.
Additionally there are hidden parameters which are any interface items in your patch (number boxes, toggles, bangs) which can also be mapped to when building the project. To view these additional parameters set bool showHiddenParameters = true which you can find at the top of render.cpp.
Assigning Bela analog inputs to a parameter
At the top of render.cpp (part of your project files in the IDE) you will see an vector called parametersFromAnalog where you can enter the indexes of the parameters you want to control from your RNBO patch.
For example parametersFromAnalog = {0, 1, 2, 3, 4, 5, 6, 7}; will directly map the Bela’s 8 analog inputs to the first 8 available parameters on the list (remember that on Bela we use zero indexing). Once you run the project with parametersFromAnalog filled in you will see the mapping printed to the console.
[0] input - controlled by analog in 0
[1] time - controlled by analog in 1
[2] scale - controlled by analog in 2
[3] color - controlled by analog in 3
[4] volume - controlled by analog in 4
[5] mix - controlled by analog in 5
[6] spread - controlled by analog in 6
[7] filter - controlled by analog in 7
The analog input from Bela will automatically be rescaled to the full range of the parameter as defined in the RNBO patch and is sent unfiltered once per audio block.
To see the current range of a parameter within your RNBO patch, right click on the relevant [param] object and click "Inspector". Here you can see the minimum, maximum, initial value, and exponent of the parameter range.
Any remaining analog input channels are sent as extra audio ins. Further customisations of parameters (e.g.: controlling them via digital in/extracting them via analog out or digital out) can be achieved by customising the render.cpp file.
Sending signals to analog outputs
All analog out channels are used as extra audio outs. These are channel numbers 3 - 10 of the [dac~ ] object. Channels 1 and 2 are audio left and right. If you want to send a signal to analog output 2 you would send to [dac~ 5].
Assigning Bela digital inputs to a parameter
These work in exactly the same way: enter the indexes of the parameters you want to control in the vector parametersFromDigital. If you would like to skip an entry in the array you can do so as follows inserting kNoParam. This is useful if you want to address digital in 7 for example without assigning the inputs beforehand.
static std::vector<unsigned int> parametersFromDigital = {
	kNoParam,
	kNoParam,
	kNoParam,
	kNoParam,
	kNoParam,
	kNoParam,
	4
};
The end result of the above will be that digital input 7 on Bela will be assigned to parameter 4 from the RNBO patch.
Controlling Bela’s digital outputs
A similar logic can also be applied to Bela’s digital outputs. You can use the [param] objects in Max as outputs like in the below patch.
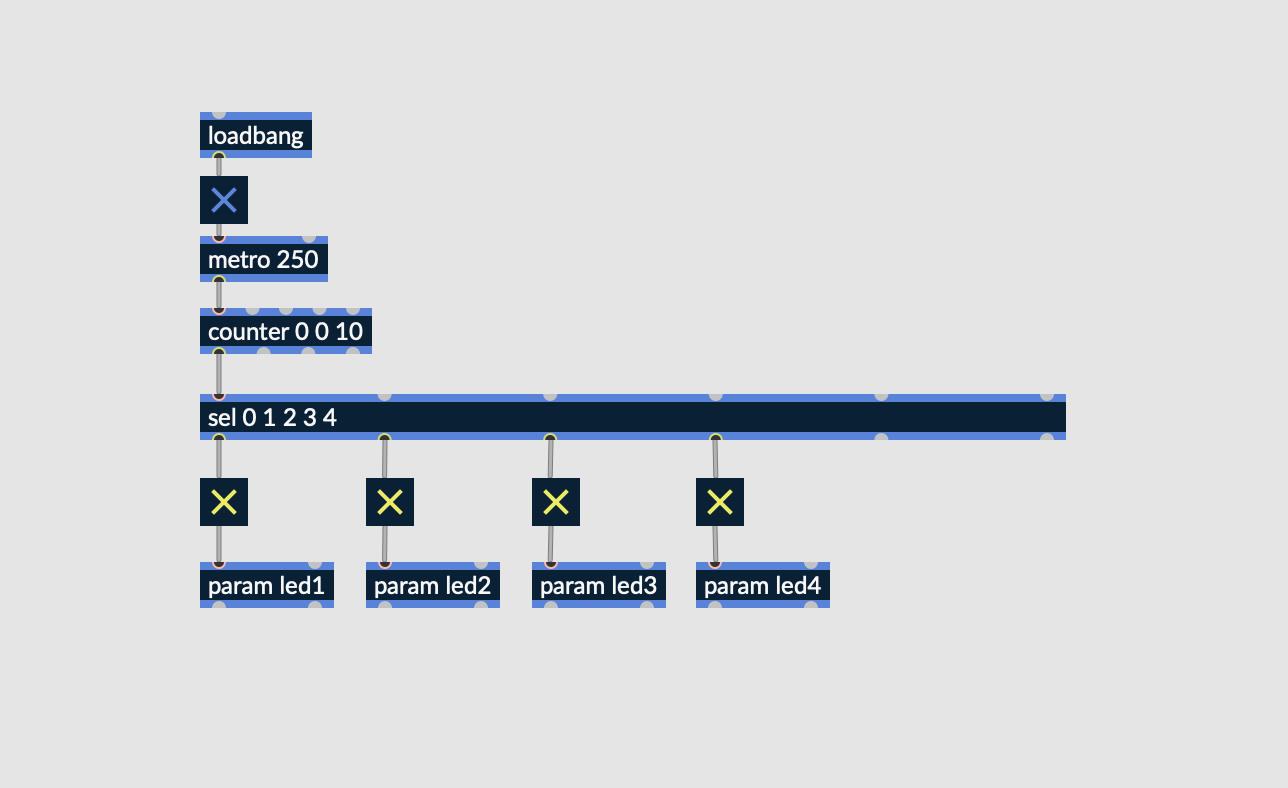
You can then assign Bela’s digital outputs to these params using the parametersToDigital vector.
static std::vector<unsigned int> parametersToDigital = {
	kNoParam,
	kNoParam,
	kNoParam,
	2
};
The end result of the above will be that digital output 4 on Bela will be assigned to parameter 2 from the RNBO patch.
Loading presets
If you also copy presets.json to the project, presets will be read and the first one (by default) will be loaded. Note that any parameters set by the presets but also controlled by Bela’s analog inputs will be overridden by the analog inputs.
TODO
- Calling setParameter() for every audio callback uses an excessive amount of CPU. We should use a filter and a quantiser with hysteresis and only update on changes to be more efficient.