Recording Samples
Record live samples and loop playback
This tutorial examines recording samples from a live audio stream, and playing them back.
Table of contents
Live sampling of audio
In this tutorial we’ll create a simple digital sampler. Digital sampling works by recording a snippet of audio into a buffer of memory and then playing back that snippet at different speeds (pitch-shifting) and with different manipulations.
Hardware setup
This hardware setup uses the same setup from the last example (2 analog sensors, a button, and an LED), with the addition of an electret microphone:
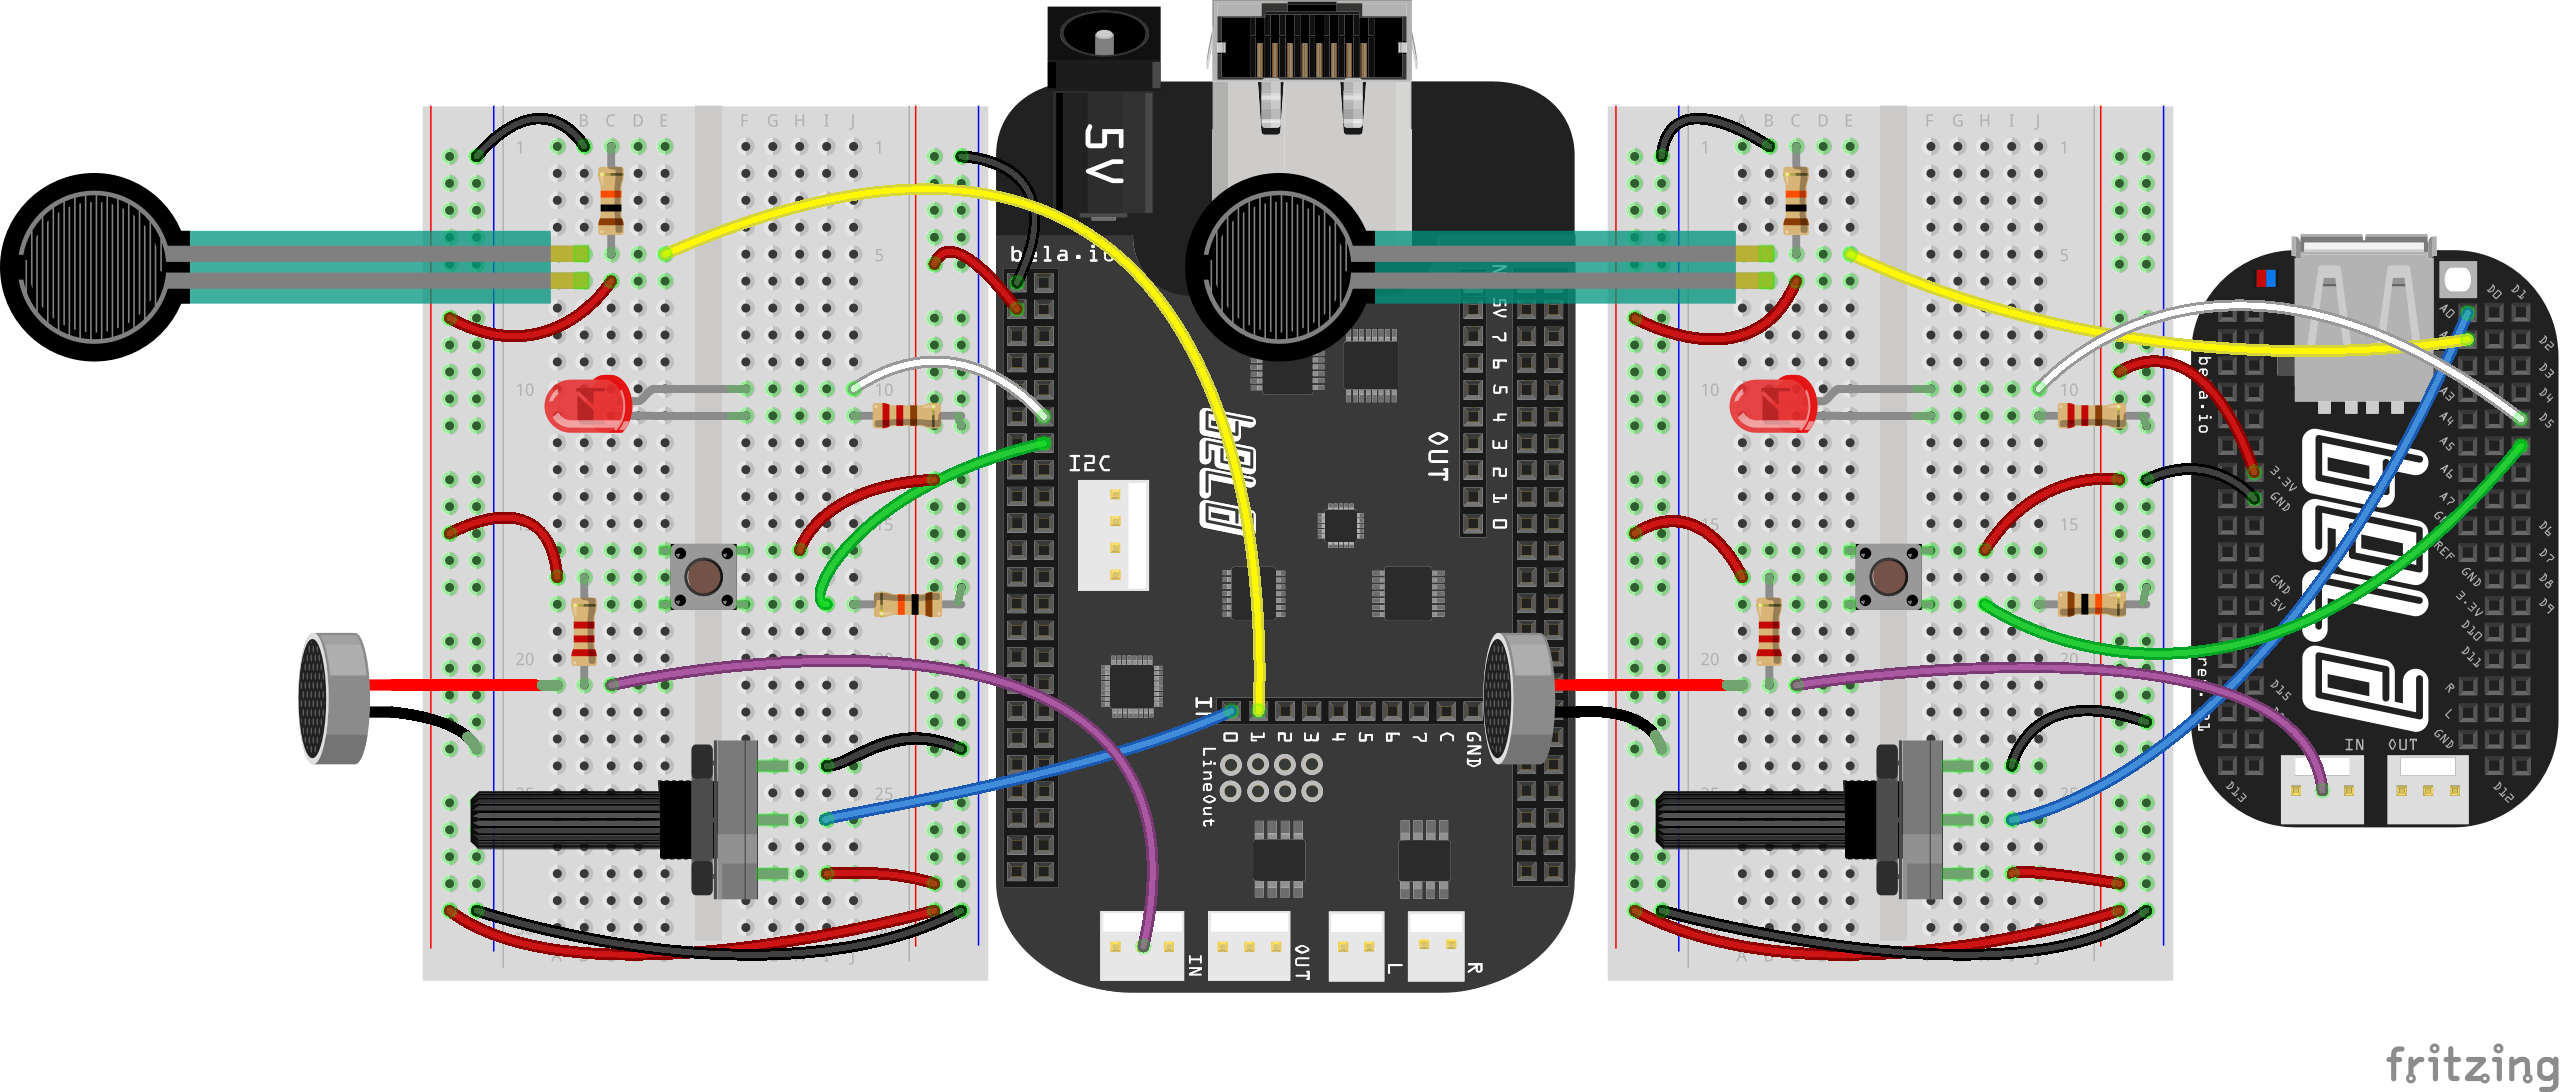
Remember that the electret microphone is polarised! Locate the ground pin on the underside of the microphone - the one that connects to the outside casing is ground. Also remember that you’ll need a pin to socket jumper wire to connect the microphone to the audio input pin.
The code
Find the samples-record sketch in the Pure Data section of the Examples tab of the Bela IDE.
1. Recording a sample from the microphone
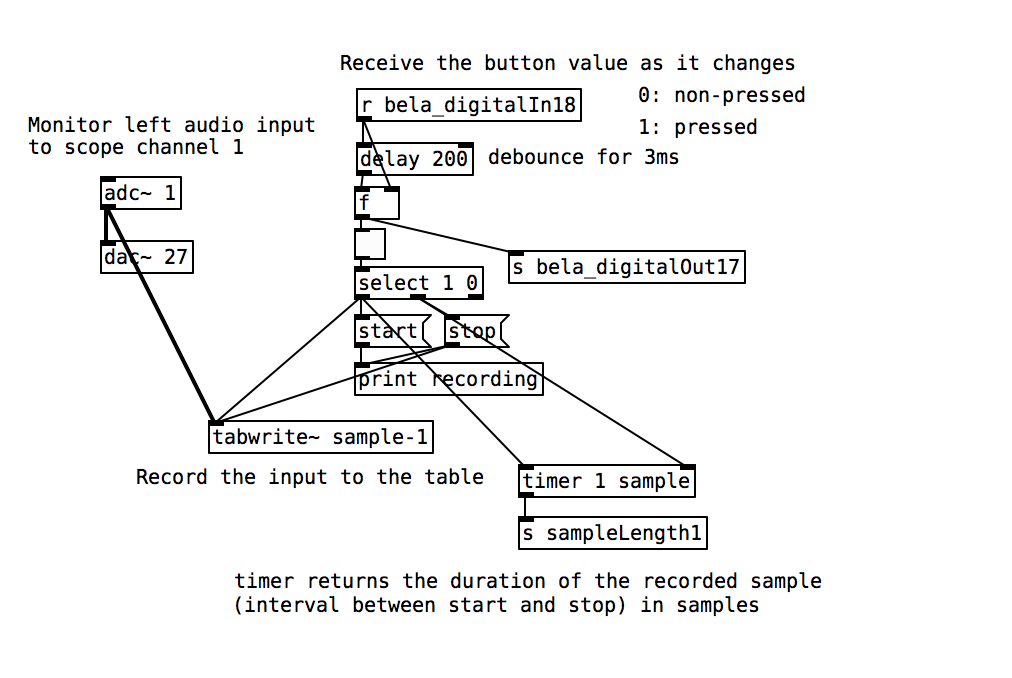
In the last tutorial we loaded a sample from disk into the table for playback, but this time we’ll record directly into the table using the [tabwrite~] object.
The first thing we do in this patch is initialise the digital inputs and output for the button and LED.

2. Hold button to fill the table
We’ll capture audio and store it in the table when the button is held. We do this by sending the [start] or [stop] message to [tabwrite~], depending on the button state. Note that we also send the sample length to the playback section of the patch.
Practice tasks
Task 1: Add an overdub control to the sampler
Currently when the button is pushed we completely replace the audio stored in the table with a new recording from microphone, but we could choose to mix between the new audio and the old audio and layer them one on top of the other. To this we need to mix an amount of the previous recording in with the microphone recording.
Task 2: Play the sample back at different pitches
The speed of the [phasor~] object controls the speed - and therefore pitch - of playback. In this patch when 1.0 is received from [adc~ 4] the sample will be played back at its original speed, and that reading is remapped to a range of -2.0 to 2.0. When the reading is at 2.0 the sample will be played back an octave higher, as the sample will be read twice as fast. When the value is negative the sample will be played back backwards as the reading will start from the end of the table and go backwards. Try using [mtof] to pitch the sample to a diatonic scale.