Virtual String Synthesis
Creating virtual strings with Karplus-Strong
In this example we’ll revisit physical modelling with Karplus-Strong synthesis, an algorithm for simulating the sound of a plucked string.
Table of contents
Plucking, Picking and Strumming
Karplus-Strong synthesis was first discovered in the 1980s by Alexander Strong, who invented the algorithm, and Kevin Karplus, who did the first analysis of how it worked. This synthesis technique produces a sound resembling a plucked string by feeding the filtered output of a delay line back into itself.
This algorithm led the way for a very important branch of digital synthesis known as waveguide synthesis, which allows for the physical modelling of complex instrument acoustics. Traditionally Karplus-Strong synthesis would use a noise burst to excite the virtual string. In our case we are going to use the left audio input as an excitation mechanism of the string, using a piezo disc.
Hardware setup
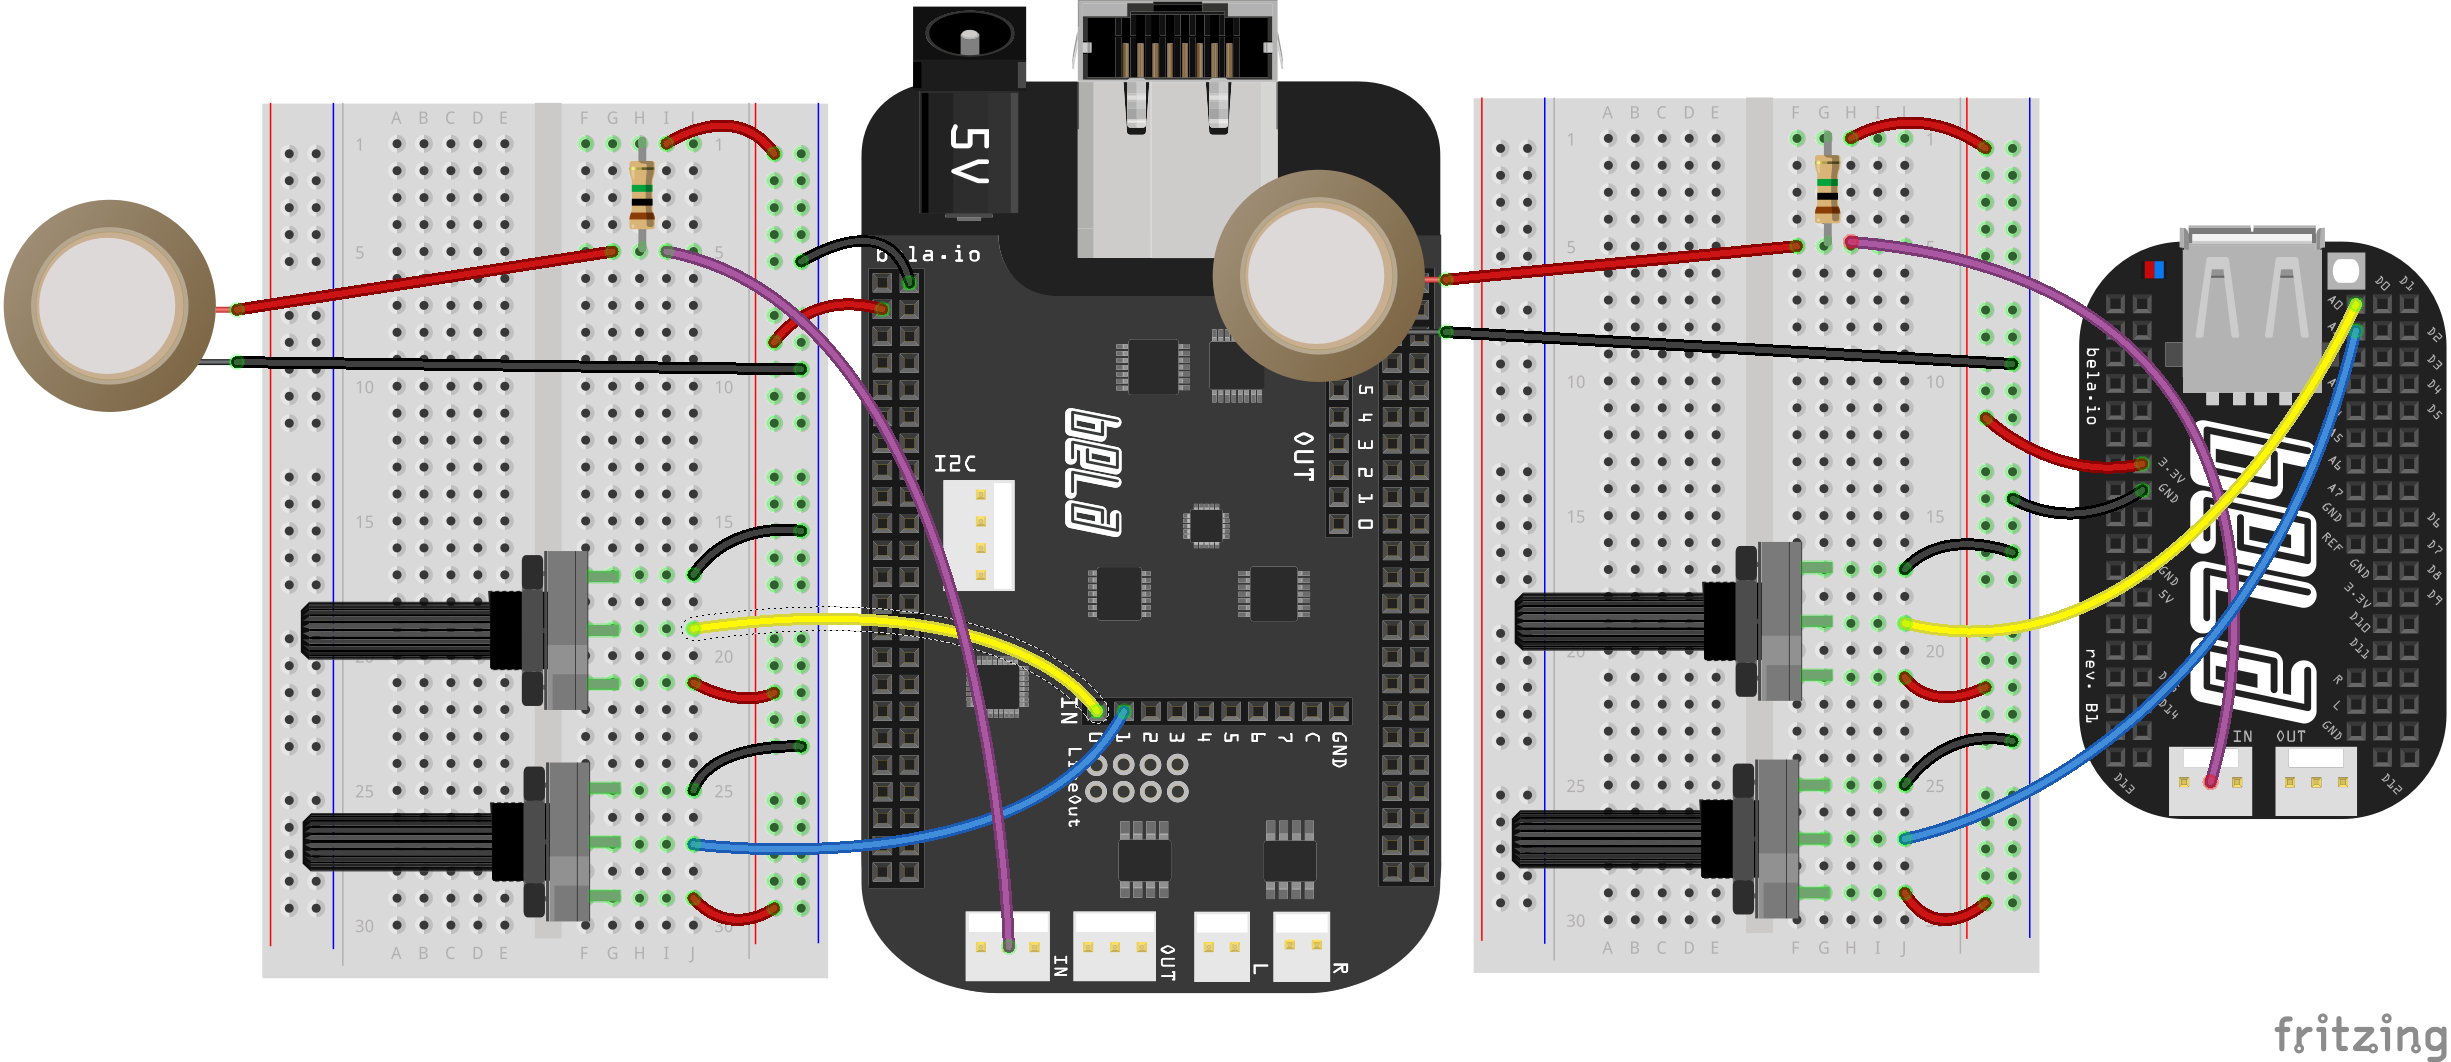
For this tutorial we’ll need two potentiometers connected to analog inputs 0 and 1. Additionally we’ll need a piezo disc connected to a 1MΩ resistor to capture vibrations, feeding the output directly into the audio input.
About the piezo disc
A piezo disc functions like a microphone, but instead converting fluctuations of air pressure caused by sound waves to voltage, a piezo disc registers vibrations that travel through solid matter, or even liquid. Piezo discs rely on the piezoelectric effect: Piezo discs are made out of a specific material that produces a tiny amount of voltage when it’s knocked, moved, or vibrated.
Piezo discs usually capture vibrations through solid matter. If we attach the piezo disc to a table and then knock or scratch the surface, the disc will sense this and produce a varying voltage much like a microphone - this is why they’re sometimes called contact mics. It’s no wonder that piezo discs are common for creating DIY pickups for acoustic instruments, because they’re cheap and effective.
As well as sensing vibration through solid matter, piezo discs can also sense vibration through liquid. Encasing a piezo disc in a waterproof enclosure, such as a block of cast resin, can create a hydrophone for recording sounds under water.
The code
Find the karplus-strong sketch in the Pure Data section of the Examples tab of the Bela IDE.
1. Exciting the string
In this classic implementation of the Karplus-Strong algorithm a noise burst is used to simulate the energy put into a string by a finger or plectrum but in our case we are using the piezo disk to excite the delay line directly.
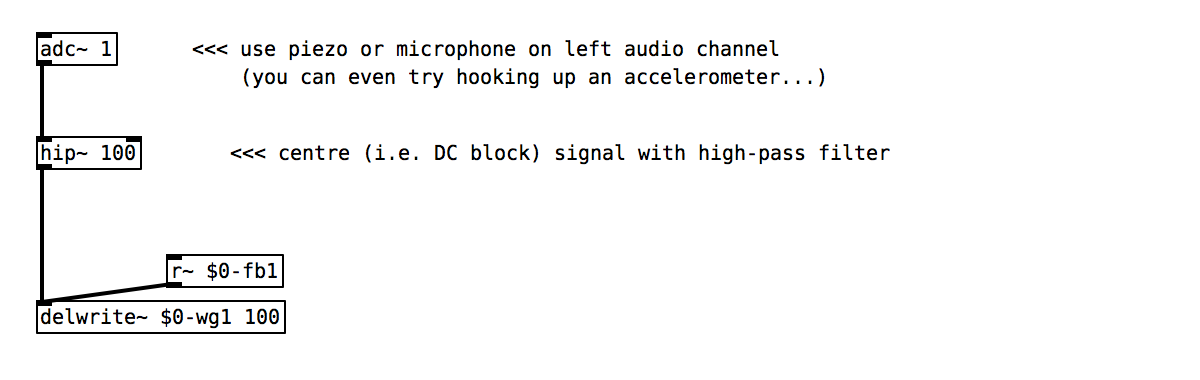
We receive signal generated by the piezo in [adc~ 1]. Before passing that signal to the delay line we apply a high pass filter at 100Hz with the [hip~ 100] object - this removes any DC offset in the signal, and position the signal around the zero point.
[note of bipolar signals versus analog signals]
2. Delay line with feedback
Here we use the [vd~] object to read from the delay line (the amount of delay applied is specified by the signal coming into the top inlet). This will return the delayed signal from the specified table.
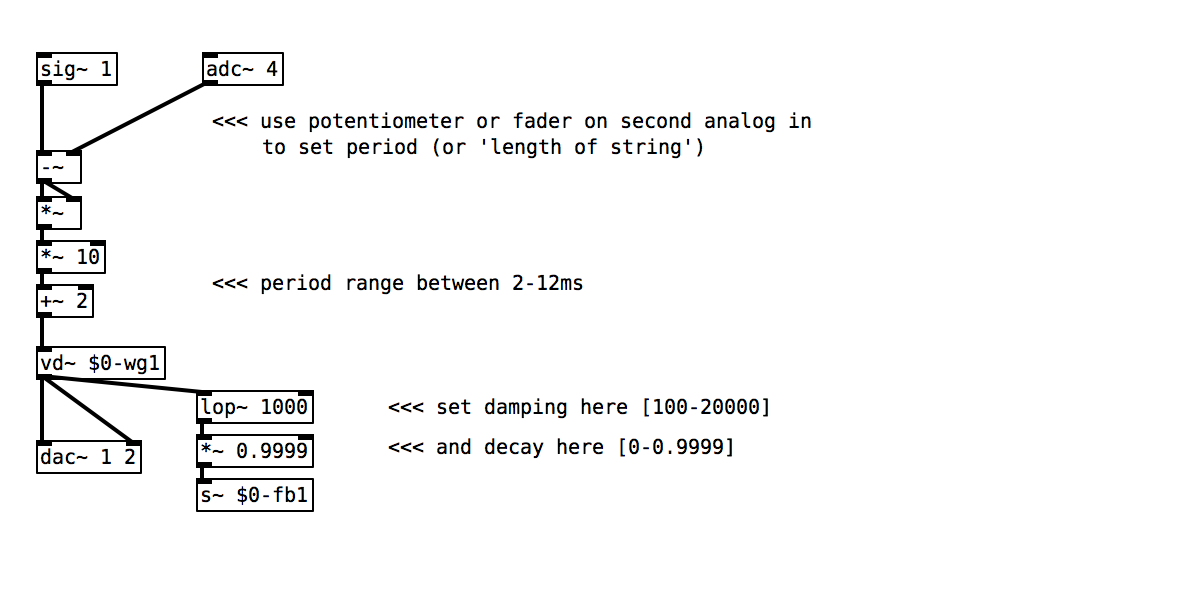
In the above code snippet we use the potentiometer connected to analog input 1 to control the amount of delay. This potentiometer signal comes in on [adc~ 4]. Increasing this delay is like increasing the length of the string we “pluck” by tapping the piezo.
Finally we have a feedback path that sends the signal from [vd~] back into [delwrite~]. As this value increases, the amount of dampening that we apply to this synthesised string increases, and the sound will ring out for a shorter amount of time.
Practice tasks
Task 1: Control the dampening of the string
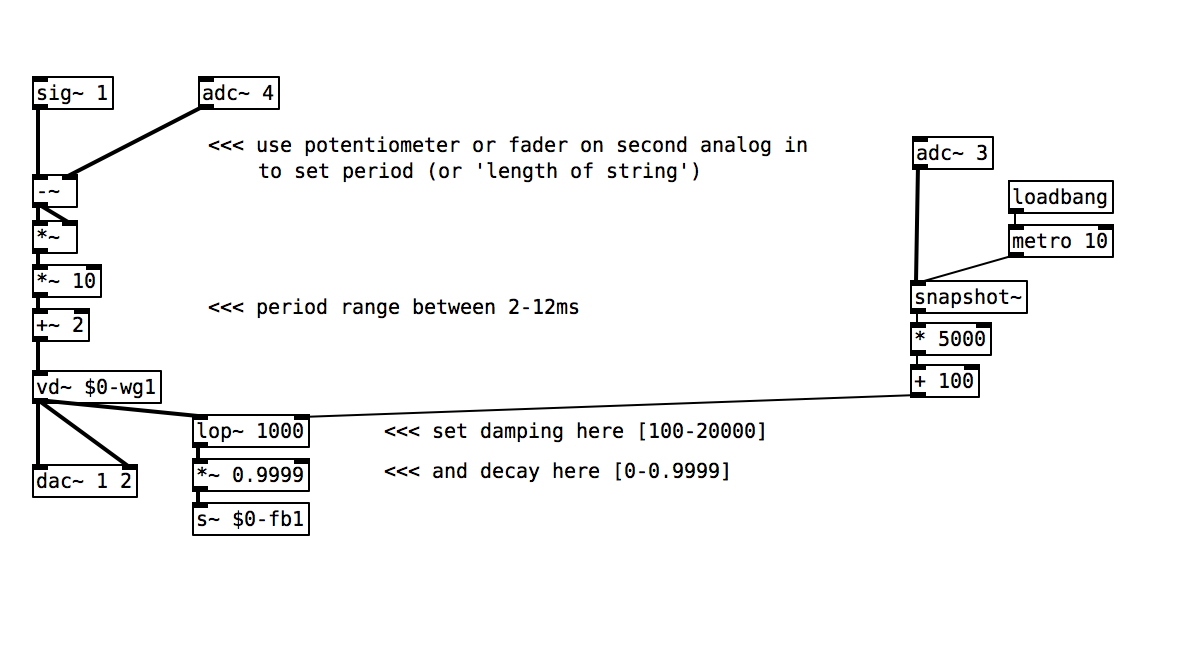
Use the free potentiometer to change the cutoff frequency of the [lop~] object. Note that you will need to use a technique from the analog input lesson to bring the signal from audio rate to the control rate which the [lop~] object is expecting in its right inlet.
Task 2: Add a second string using the right audio input
You will need to connect another piezo disk to right audio input. You will them need to duplicate the code and make sure that you change the delay line names so they are different on the copied part of your code. We recommend using one potentiometer to control the dampening of both strings. With the other potentiometer you can try defining a harmonic relationship between the pitch of string 1 and string 2 by changing the arithmetic which controls the length of the string.