Drum Synthesis
Synthesising a classic drum machine
In this example we’ll learn about some fundamental drum synthesis techniques alongside some methods for sequencing rhythmic patterns.
Table of contents
Drum Machines
Drum machines tend to be of two types: Those that trigger the playback of samples, and those that synthesise the sound of drums using analog circuitry. We will look at sample triggering in a later example but for know we’re going to look at some techniques for synthesising drum sounds using the basic building blocks of synthesis: oscillators, filters and envelopes.
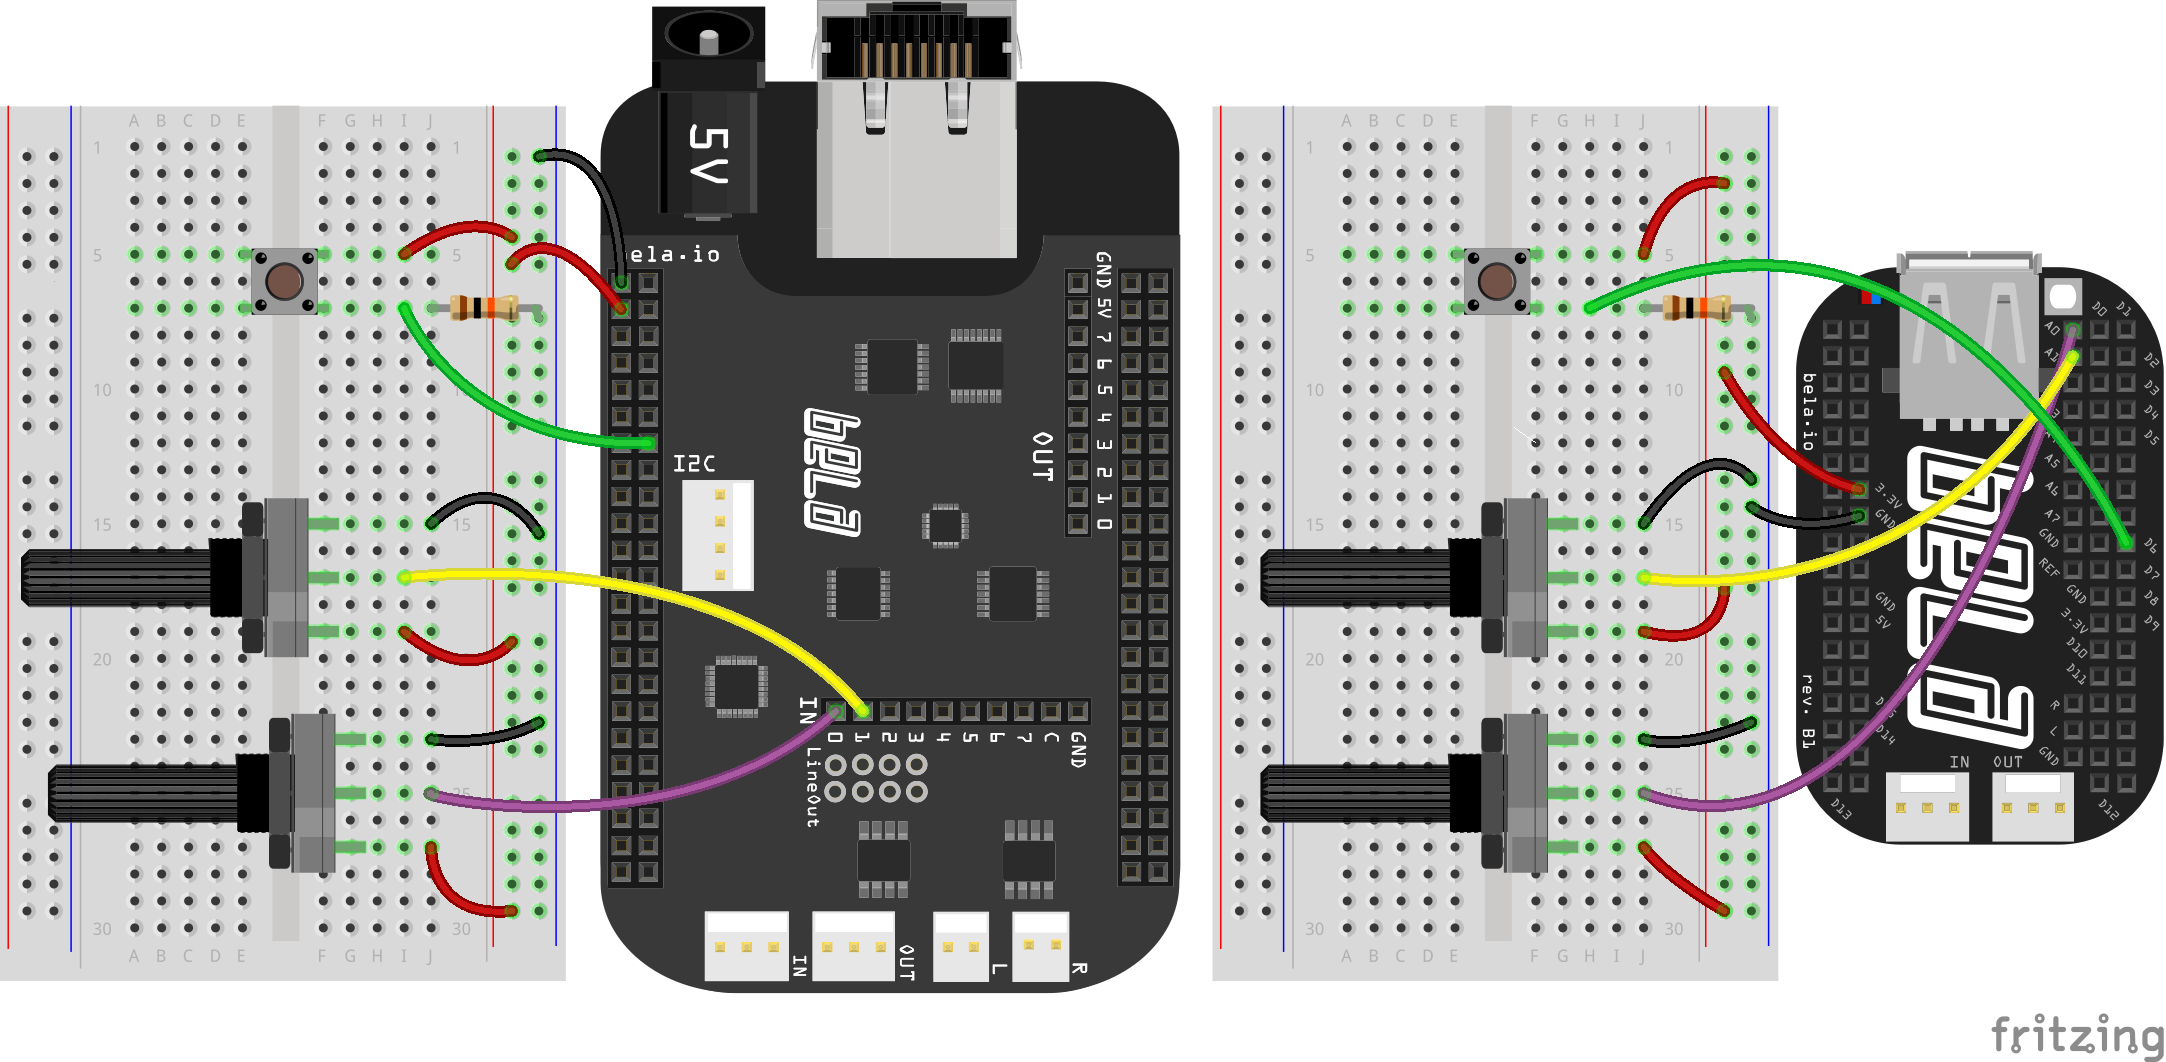
Hardware setup
For this example we want a button connected to Bela digital input 0. Additionally we’ll connect analog sensors to analog pins 0 and 1. Potentiometers will do the job nicely but feel free to try other analog sensors you might have.
The code
Find the drum-synthesis sketch in the Pure Data section of the Examples tab of the Bela IDE. This patch was developed by Jon Pigrem and inspired by the work of Andy Farnell. Teo Dannemann also helped put this tutorial together.
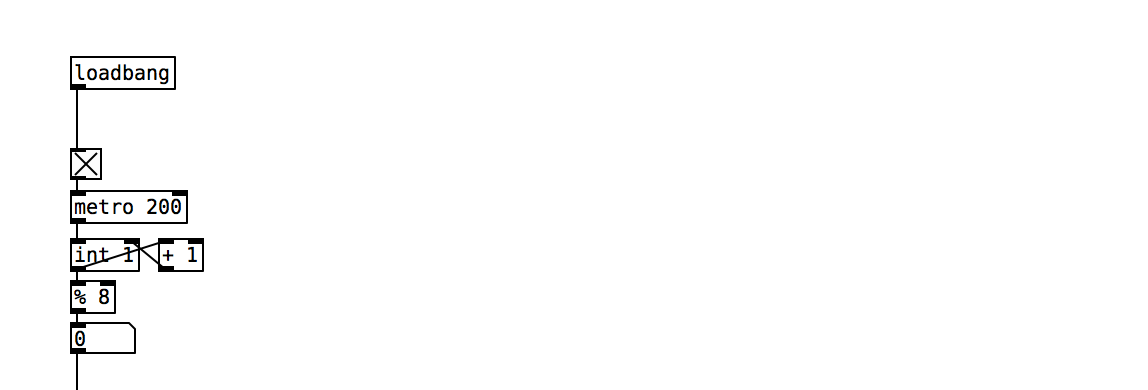
1. Basic sequencer
In order to create a basic sequencer the first thing we need is a counter which can serve as our master clock. The [metro] object will create a bang for us periodically, and we want to count the number of bangs coming from [metro] so we can create rhythm. We can do this with the combination of [int] to store the current value, [+ 1] to increment, and the [% 8]. % is the operator modulo, and it wraps the incrementing numbers around at 8.
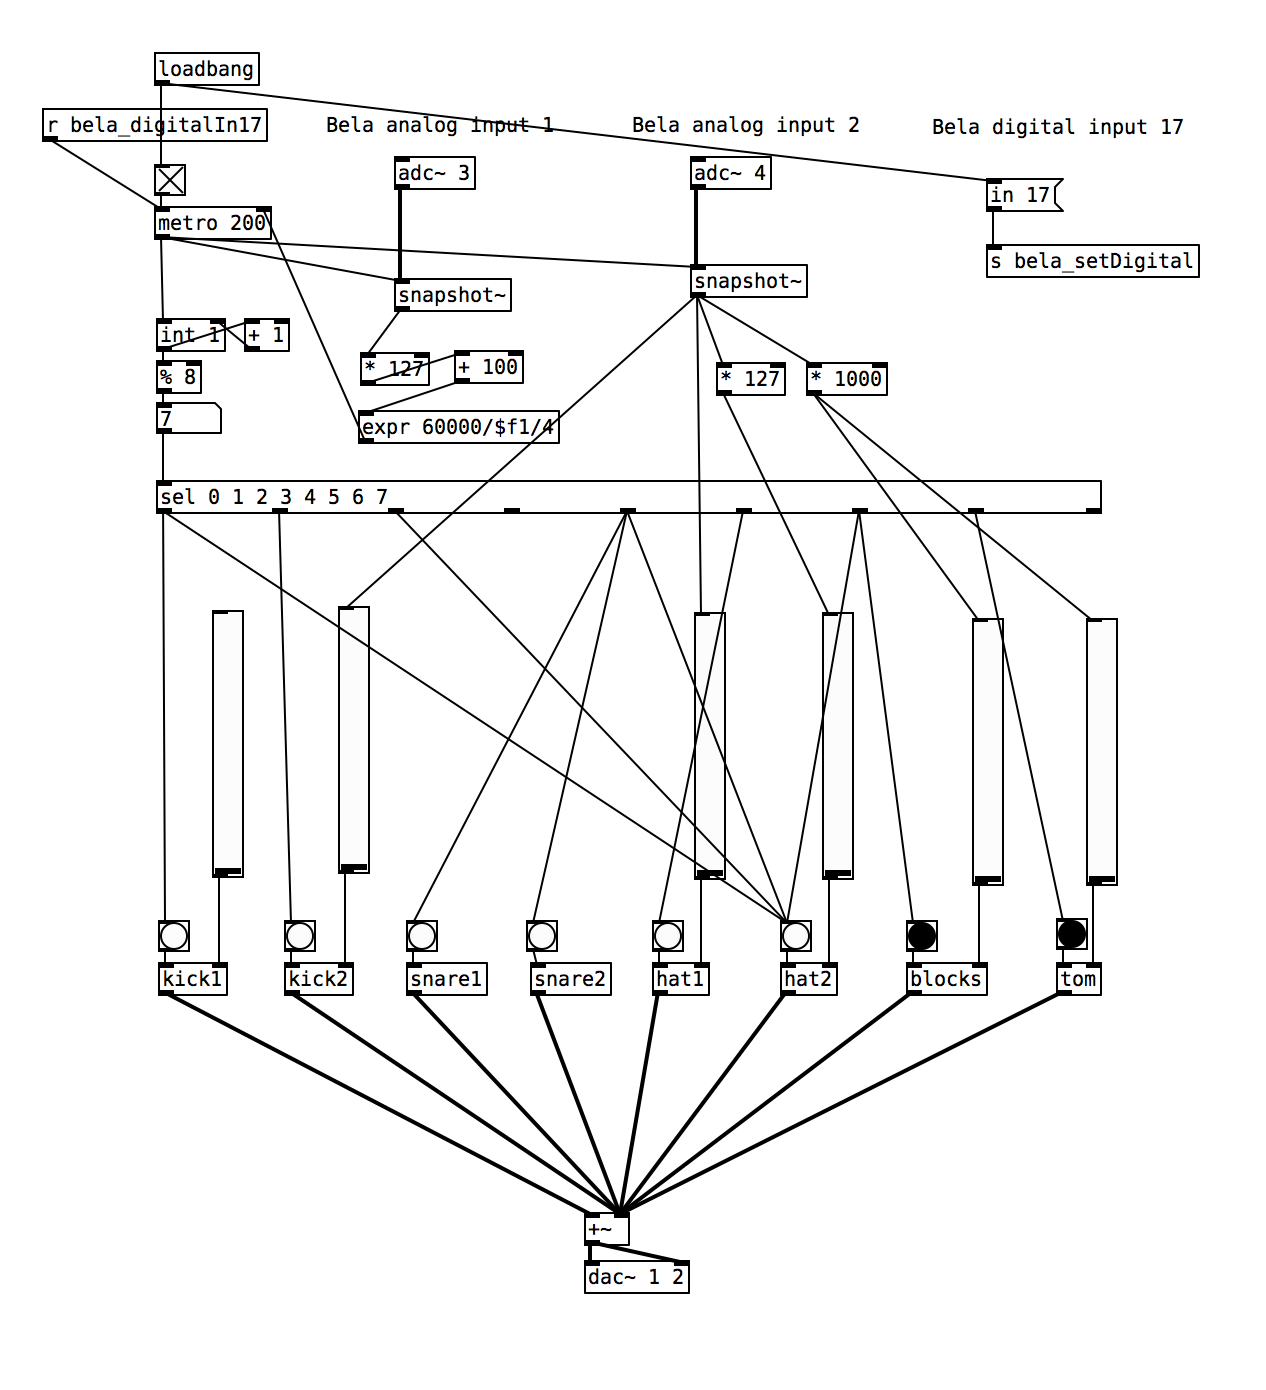
Using the [sel] object, we can then do something on a particular count, such as trigger a specific sound. For example, if we want only to have a drum on the first and fifth beat, we would only connect the first and fifth [sel] outlets to the drum modules.
2. Synthesising drum sounds
Now we use the outputs from the [sel] object to trigger the different sound abstractions we have included in this patch. We have several abstractions ready to use in the patch, like [kick1], [kick2], and [snare1]. (To find out what each abstraction does, double click on it to open it up and inspect its contents.)

When you run this example it will start a sequence of drums played back. Consider how the [sel] object is making that happen.
Practice tasks
Task 1: Use the potentiometers to control tempo and other parameters
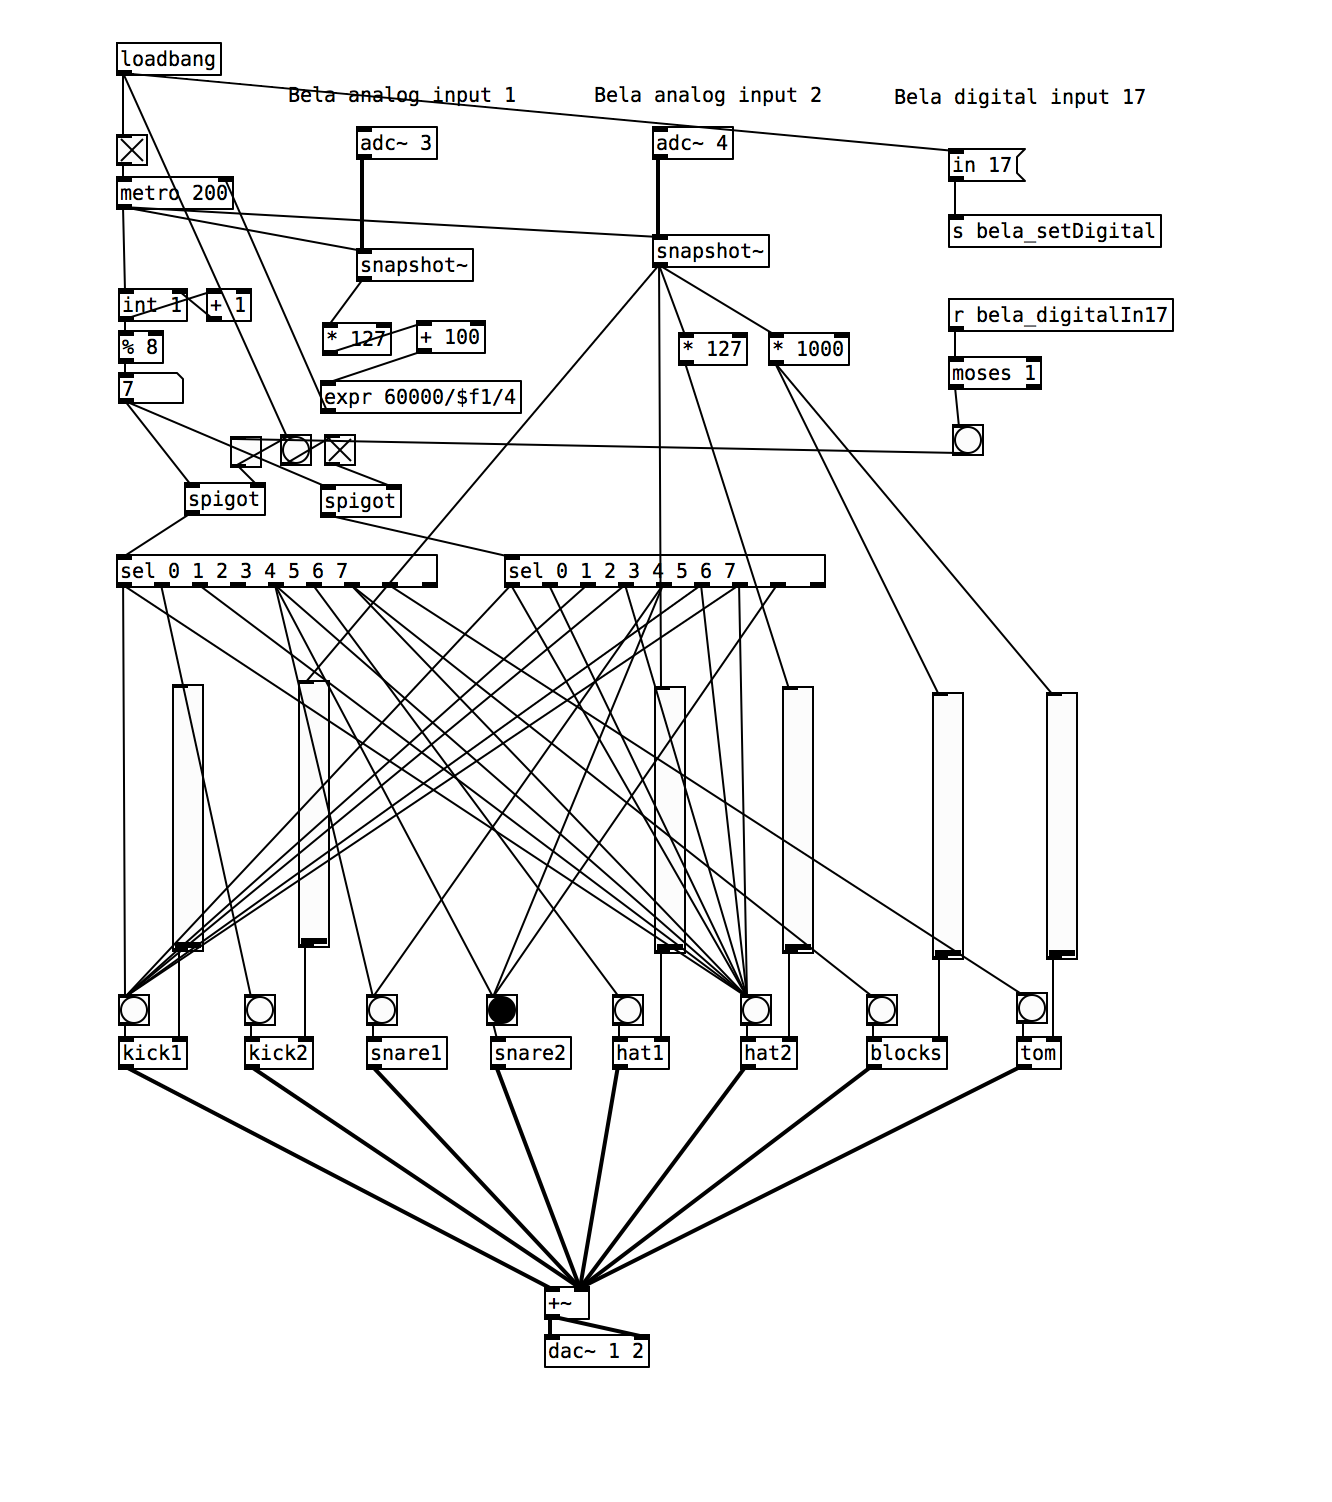
To control the tempo and other parameters in this patch we first need to convert the analog inputs from signal rate to control rate. We use the [snapshot~] object for this, and it will tell us the value of our signal every time it receives a bang.
In the example below the first potentiometer (analog input 0, and [adc~ 3] in Pd) controls the speed of [metro], while the second potentiometer (analog input 1, and [adc~ 4] in Pd) controls the timbre parameters of drum synthesis.
Task 2: Change the rhythmic pattern
Make different connections from the outlets of the [select] object and the inlets of the drum synthesis abstraction.
Task 3: Use the button to change the rhythmic pattern
In our example, the played pattern was always fixed. You can use two (or several) [sel] objects, where each one of them will map to a specific pattern. You will then have to use some kind of selection (check the help file of [moses] and [spigot]) in order to activate one of the patterns depending on the value of the button.