Accelerometer
Sensing in-air motion
Accelerometers are used in a variety of everyday devices because they sense orientation and changes in movement as they move through space. In this tutorial we’ll look at how to use these sensors with Bela.
Table of contents
Measuring acceleration
Accelerometers measure the acceleration of an object - in other words, they measure the rate of change of an object’s velocity. They can be used to sense static forces of acceleration (such as the earth’s gravity), or dynamic forces of acceleration (such as vibrations and movement).
Typical accelerometers have 3 axes of sensing, oriented on the x, y and z planes. Accelerometers have many uses in modern technological devices, from the orientation sensor in smart phones which knows which way to display the screen, to the navigation systems in airplanes.
Hardware setup
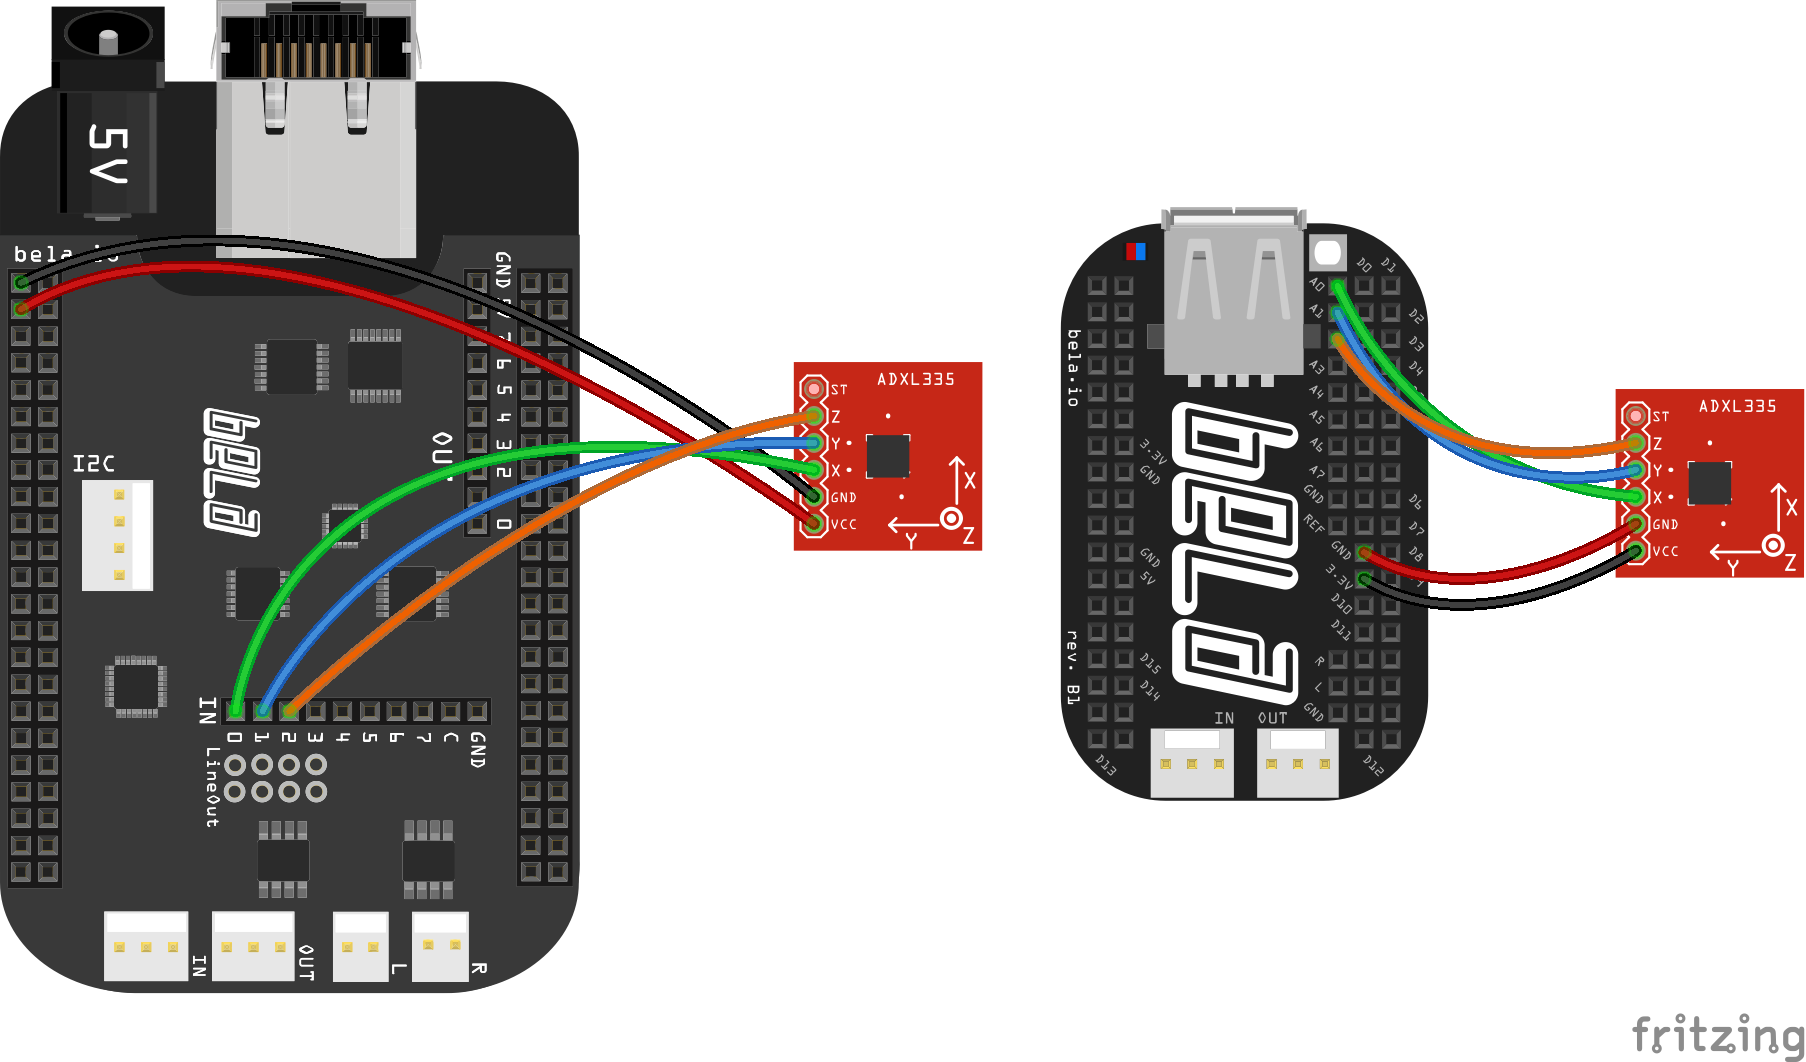
The accelerometer we’ll use is an analog device that provides a voltage we can read for each axis. To connect to Bela we need 5 wires: Power (3.3V), Ground, and one each for the X, Y and Z axes.
The code
Find the accelerometer sketch in the Pure Data section of the Examples tab of the Bela IDE.
1. Reading from the axes
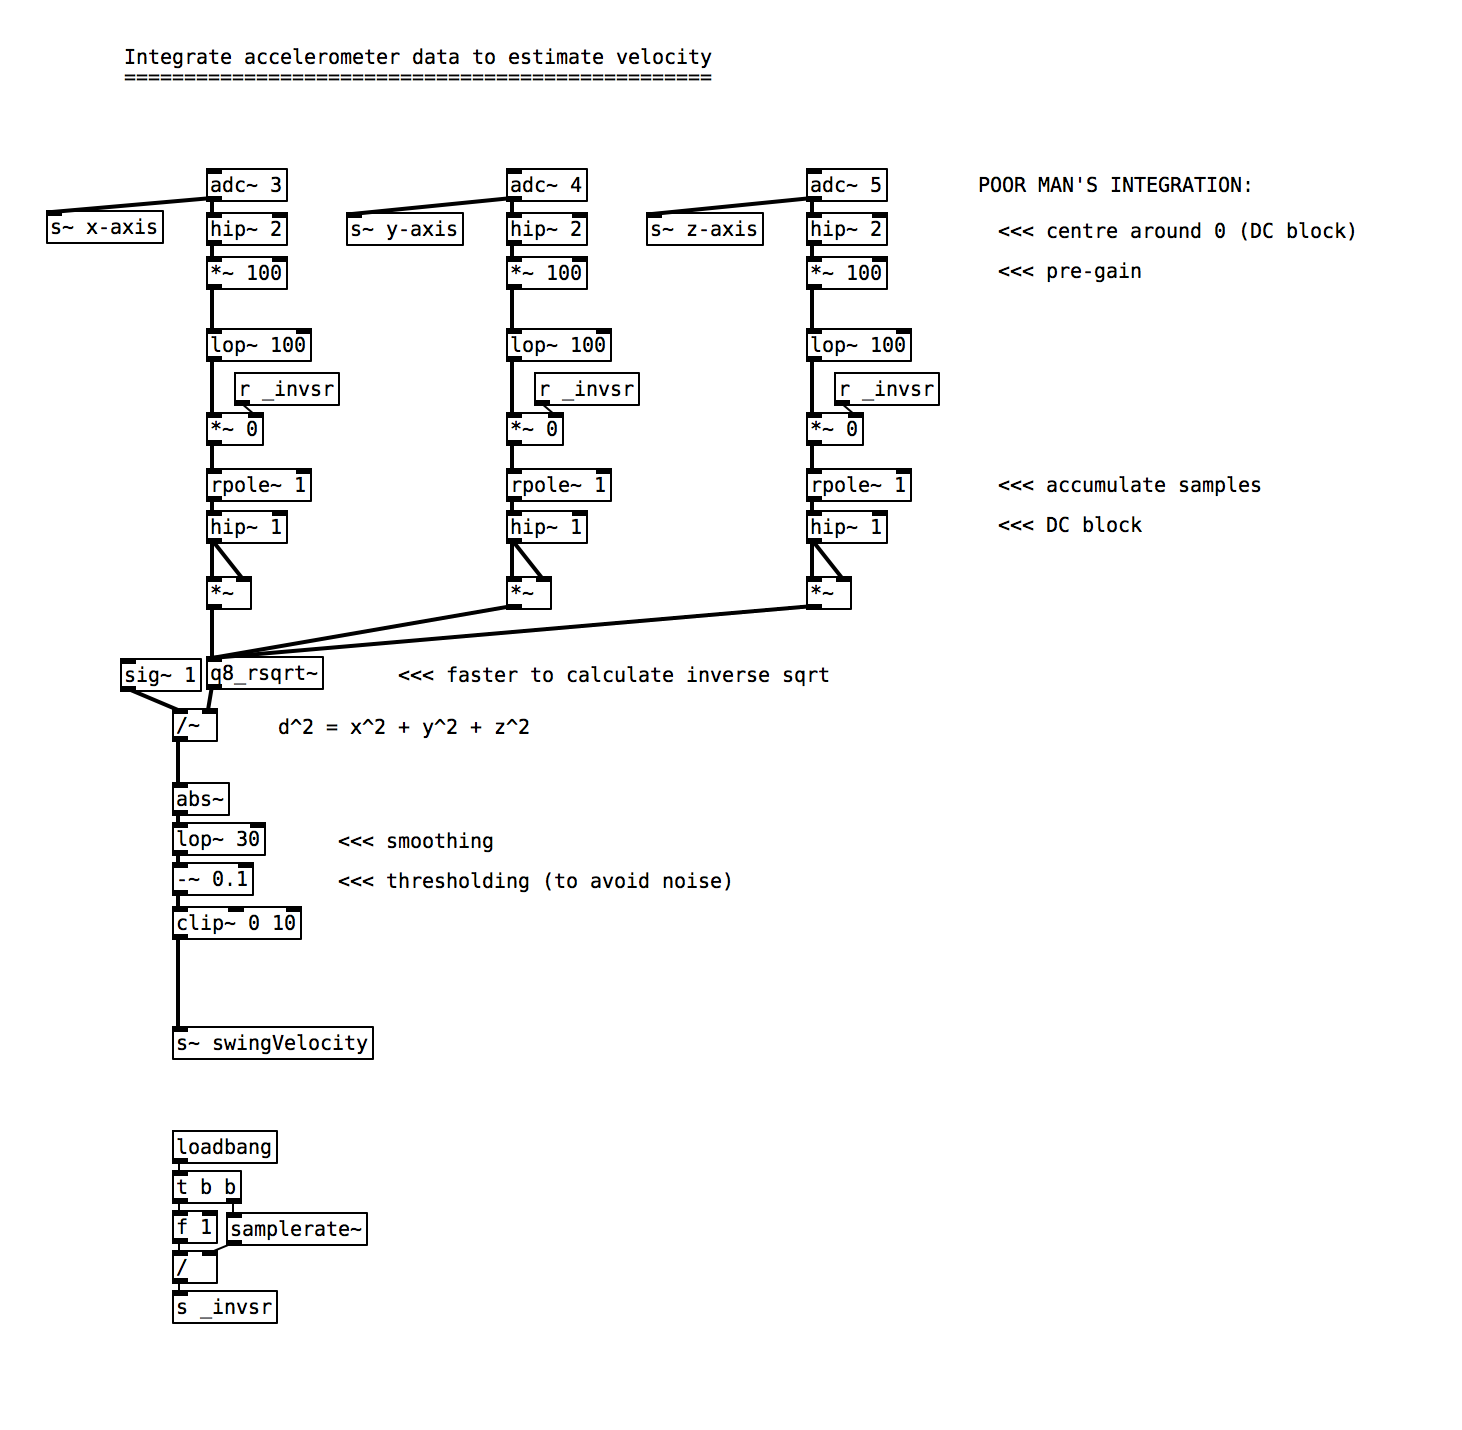
The signals from the accelerometer are read through the analog inputs 0, 1 and 2 on Bela, so they’re received in the sketch by using the [adc~ 3 4 5] object.
2. Calculating swing velocity
This example uses the swing velocity of the sensor to control the amplitude of a sinetone. Run the project and try swinging the accelerometer around, and listen to the effect. Open up the [accelerometer-integration] abstraction to see how we integrate the accelerometer data to estimate overall velocity.
Practice tasks
Task 1: View accelerometer signals on the scope
To send signals to the scope patch them to [dac~ 27 28 29 30] and then open the scope in IDE once the programme is running.
Task 2: Identify the different axes of the sensors
Use the scope to identify the different axes of motion and to see how the signals differ when you move the sensor. Take note of the maximum and minimum values you see in each axis.
Task 3: Create a 3-state system depending on orientation
Your 3-state system should depend on the orientation of the sensor. Once you have identified the ranges of each axis you can then remap the signals to a more convenient range, and use the threshold object create your 3 different states.
Task 4: Mix between 3 audio samples depending on orientation
Use the [playAudioFile~] abstraction for sample playback. Use the signal from each axis of the accelerometer to fade the samples in and out.