Working with Samples
Sample playback and manipulation
In this example we look at some different ways of working with samples, including loading them, triggering playback, and scrubbing through them.
Table of contents
Sampling sound
Sampling is a fundamental technique of electronic music which has had a huge impact on music culture, from the analog sampling of everyday sounds in early Acousmatic musical experiments with tape to the widespread use of digital sampling in hip-hop and just about every other musical genre from the mid 1980s onwards.
Digital sampling works by recording a snippet of audio into a buffer of memory and then playing it back. We can apply a range of techniques to alter the sound of that playback, such as varying the playback speed to shift the pitch.
Hardware setup
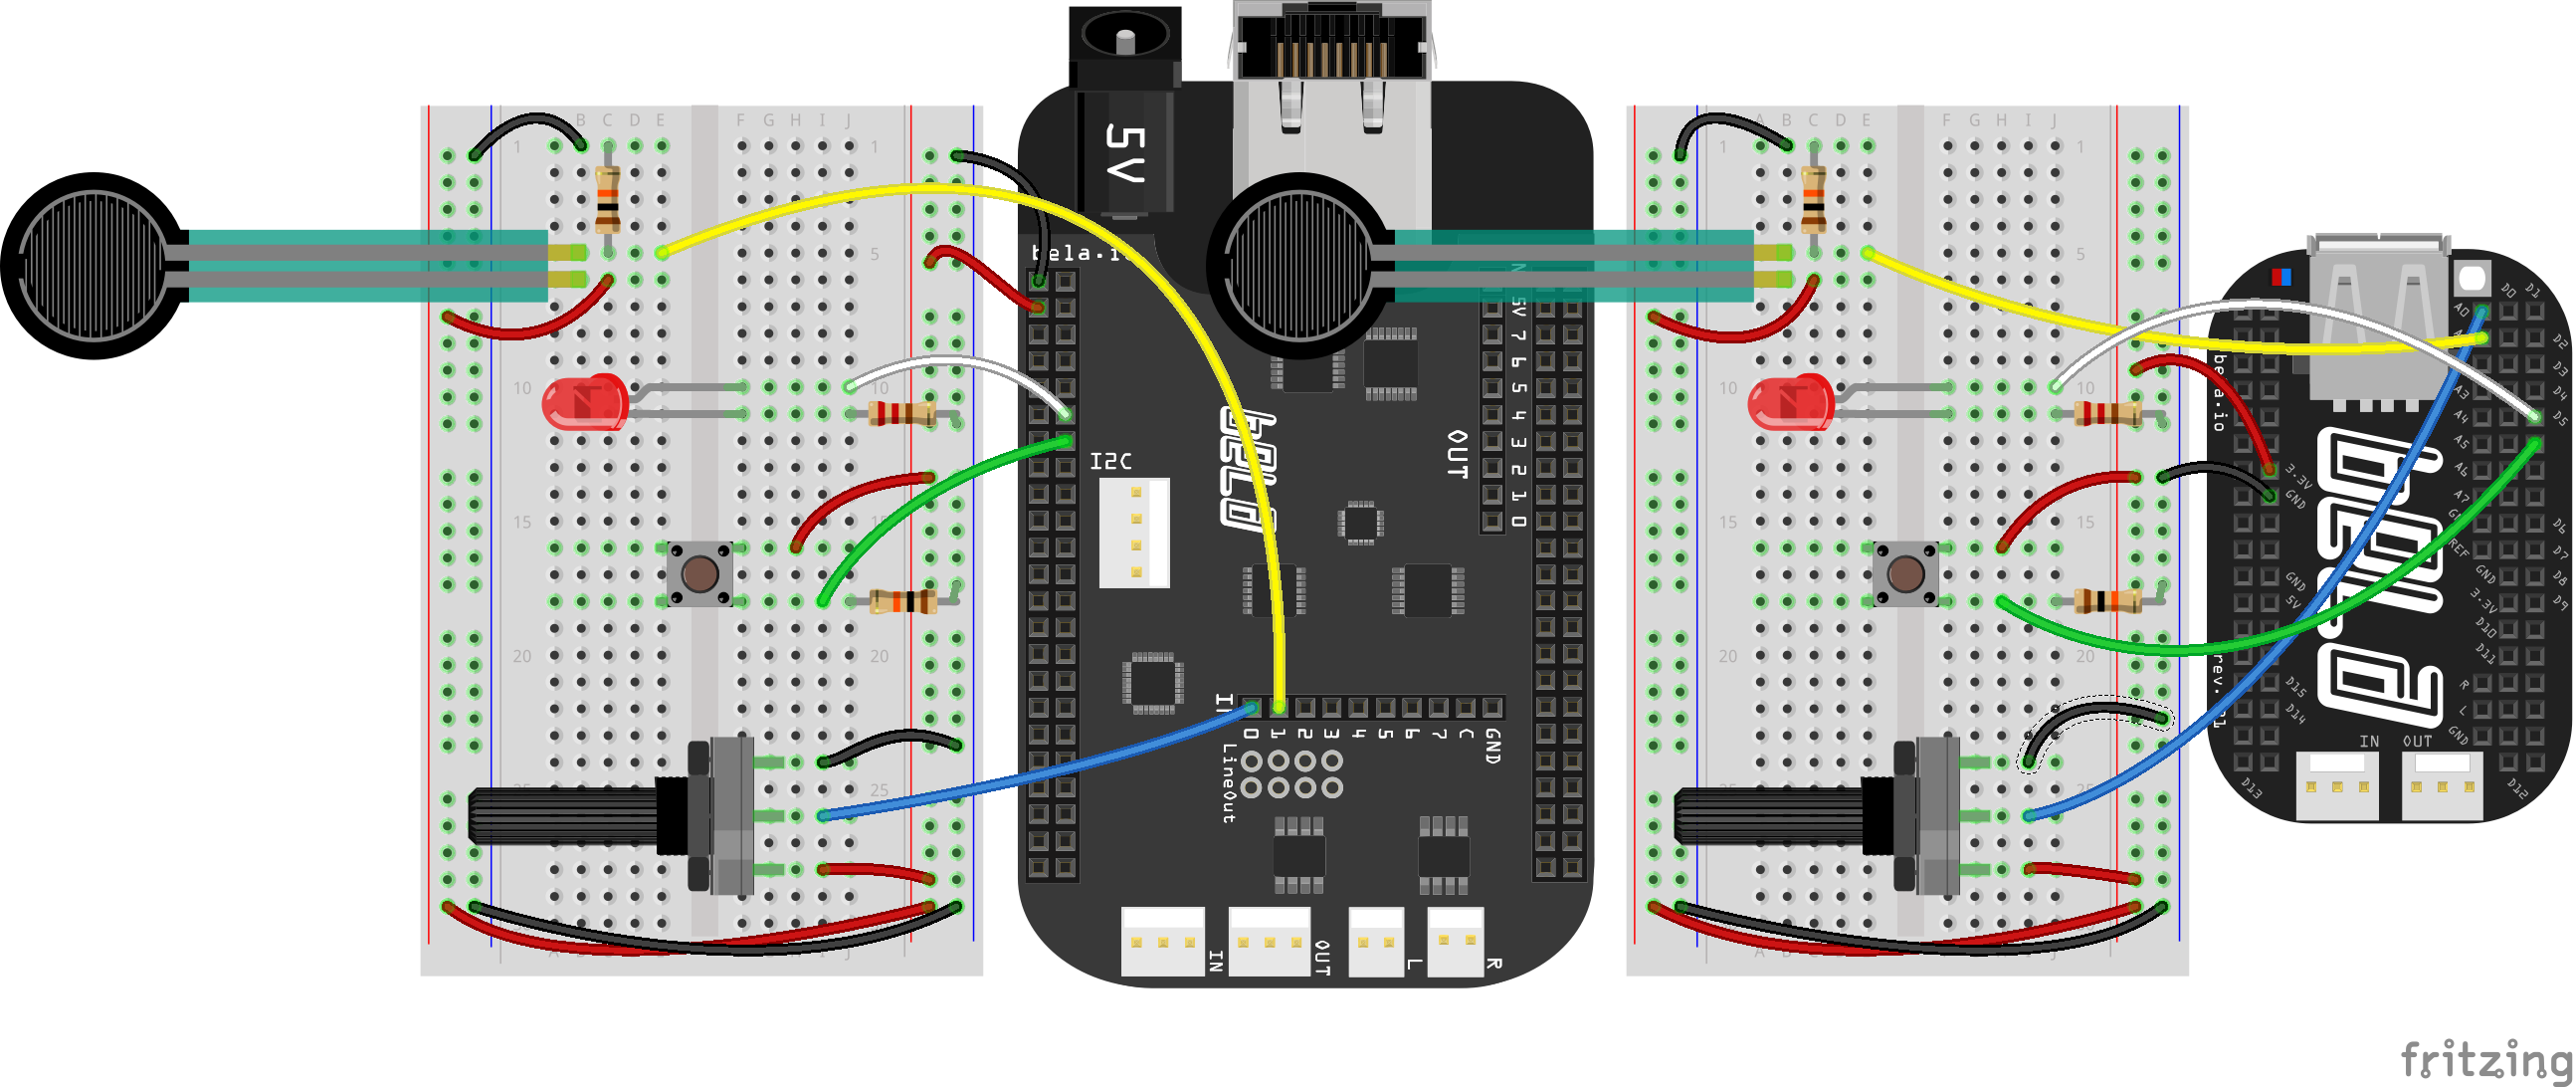
For this tutorial we’ll need to connect two analog sensors to analog inputs 0 and 1 (we used an FSR and a potentiometer but you can use any you like). We’ll also need a button hooked up to digital input 6, and an LED hooked up to digital input 7:
The code
Find the samples-playback sketch in the Pure Data section of the Examples tab of the Bela IDE.
1. Loading a sample
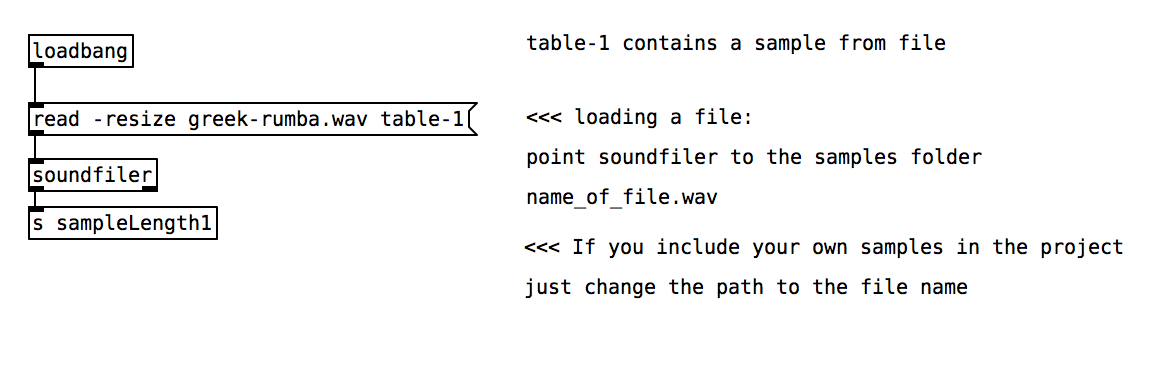
We’ll load a sample from a file stored in a table titled table-1. When the patch loads we pass the [soundfiler] object a series of arguments [read -resize greek-rumba.wav table-1] which loads the file greek-rumba.wav to table-1.
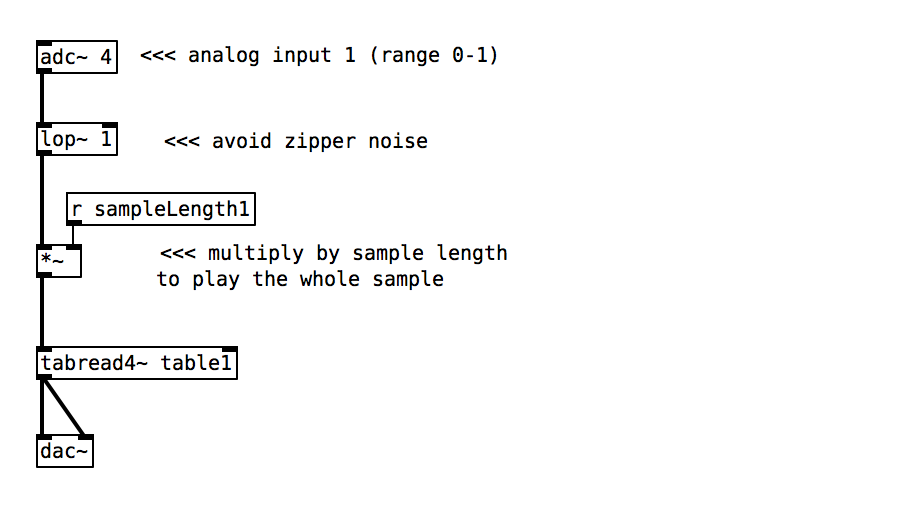
2. Playing back the sample
To play the sample back we use the [tabread4~] object, to which we need to give the name of the table. This object expects a signal with a value between 1 and total number of samples in the table - this represents the playback point in the sample, also known as the read position. We have a signal coming from a [phasor~] object (which produces a ramp that rises between 0 and 1.0), and that signal is multiplied by the sample length.
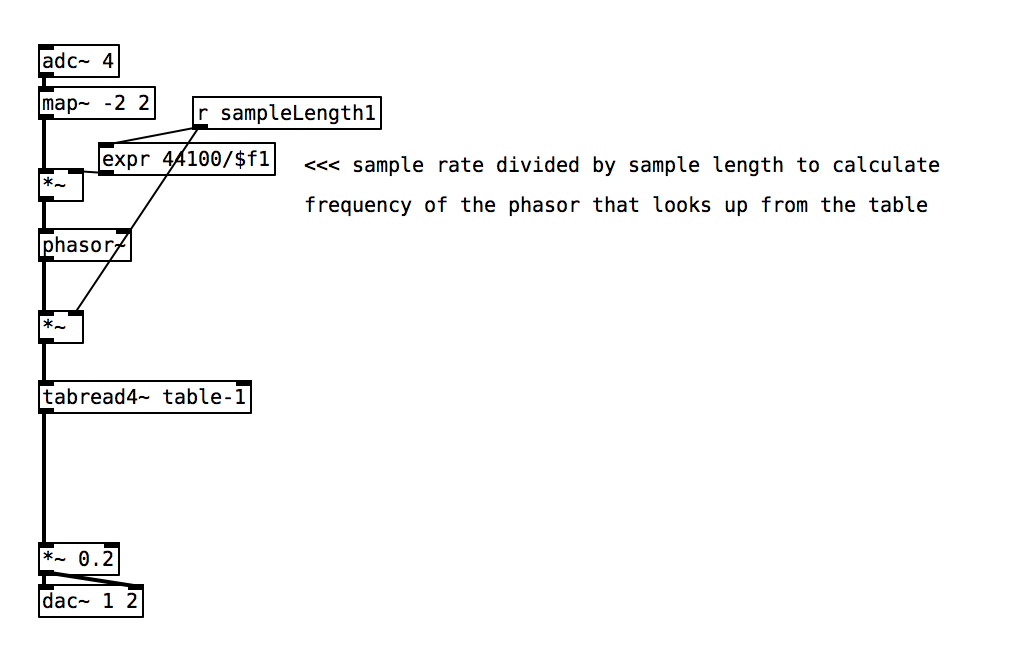
Finally this patch controls the the speed of the phasor, and hence the pitch of the playback. We map the value from [adc~ 4] to a range between -2 and 2. When the value is negative the recording will be playing in reverse.
Practice tasks
Task 1: Trigger sample playback based on sensor input
We can use the FSR for this. The [threshold~] object produces a bang when a signal passes over a certain value, and you can use this to make the FSR act more like a button. Have a look at the help file for [threshold~] to find out which arguments are expected.
We can use the result from [threshold~] to envelope the overall amplitude of the sample playback. We also need to restart the phase of the [phasor~] object by sending a 0 when the threshold is passed.

Task 2: Scrub through the sample
Instead of using the phasor object to read through the table, we can also use an analog signal to scrub through the values in a way similar to a DJ scratching a record.