Digital Output
Flashing an LED and making a siren
In this example we will work with the digital outputs of Bela and learn how to control them from Pure Data. We’ll hook up an LED and control it in different ways with Bela, and build up to create a simple siren.
Table of contents
A bit about digital signals
Both Bela and Bela Mini have 16 digital I/O which can be configured as either inputs or outputs. Digital signals can only have one of two discrete states: on or off. In the case of Bela the digital outputs can give you 3.3V when they are on or 0V when off.
Hardware setup
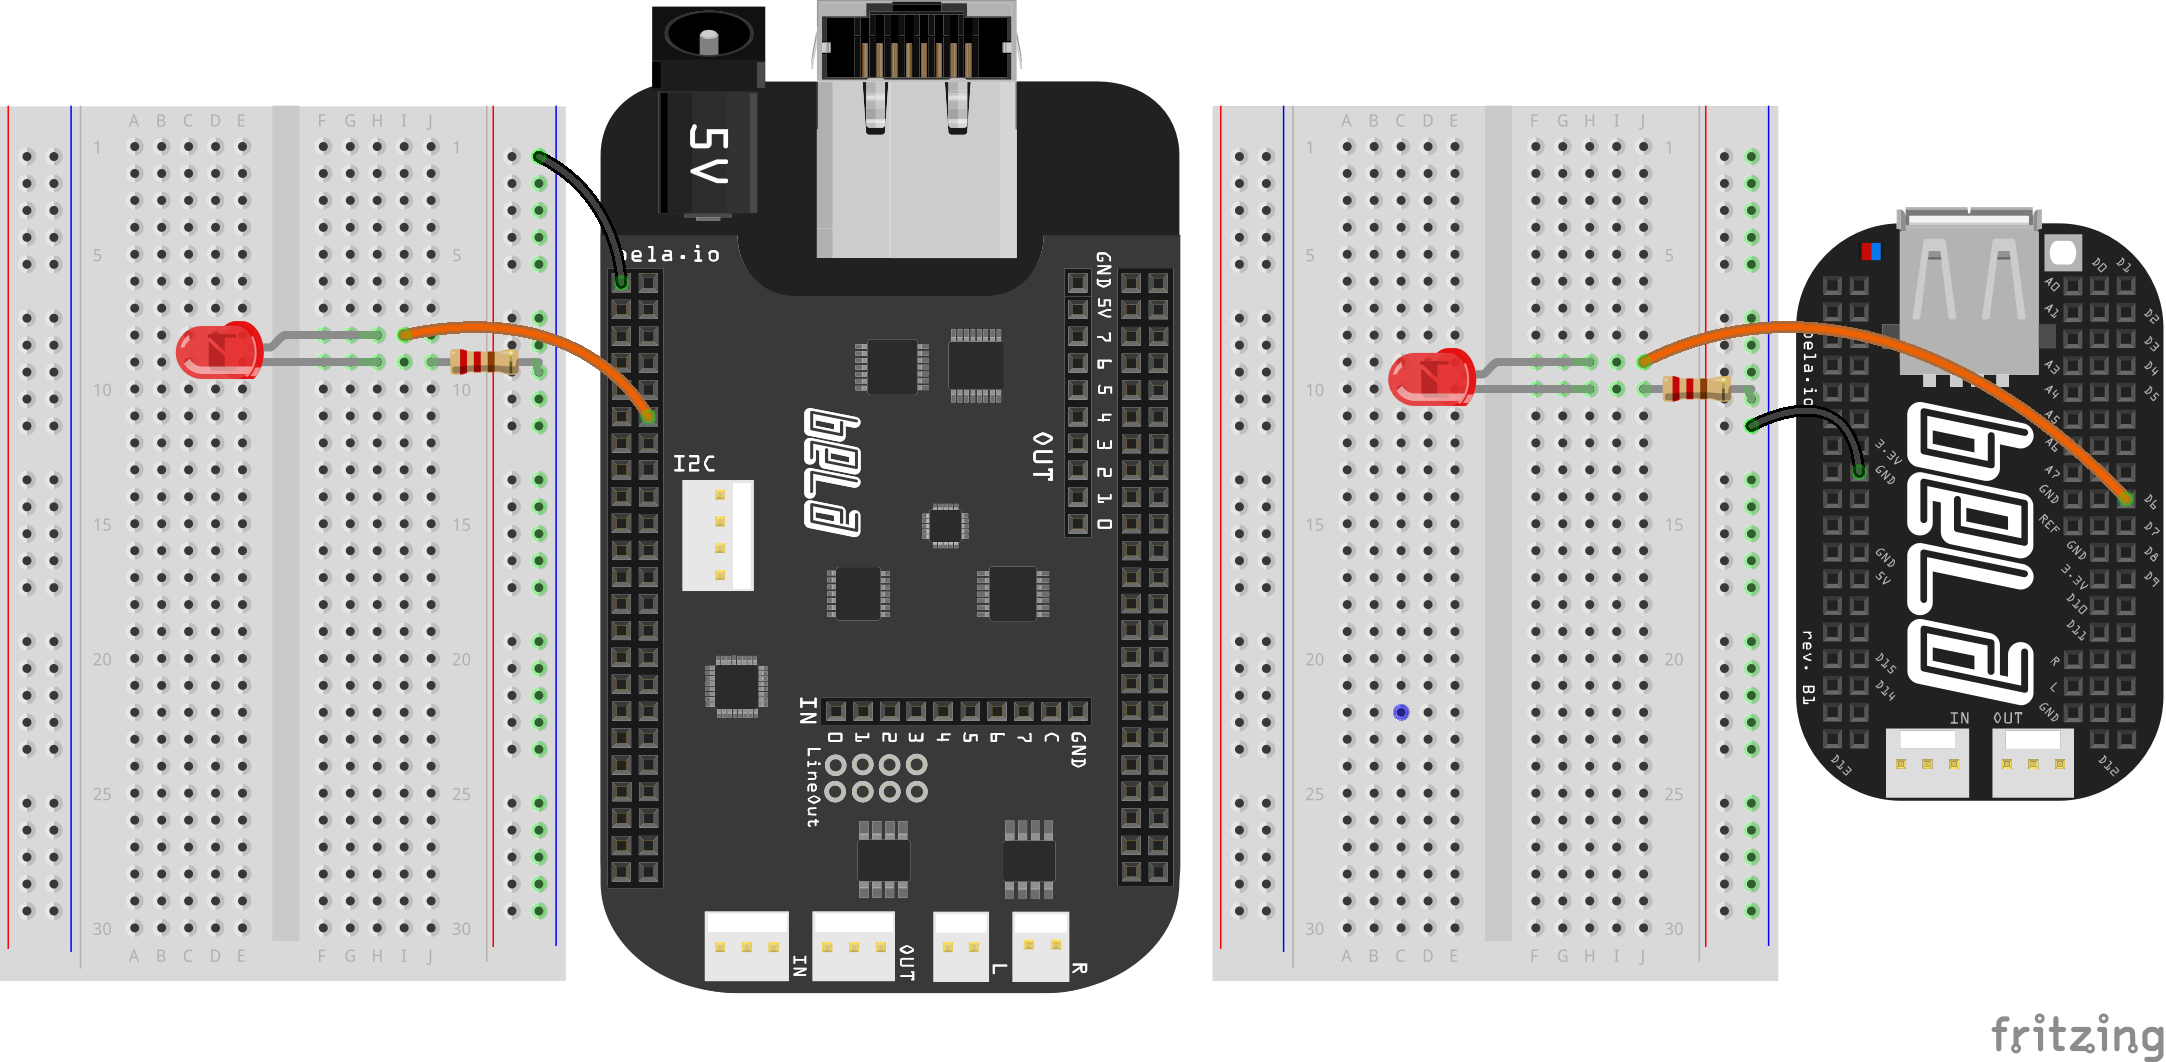
For this project we need to connect one LED to one of Bela’s digital pins.
LEDs (Light Emitting Diodes) have become a ubiquitous component that is used in many different appliances and devices. When a voltage is applied to the LED in the correct way, it lights up. LEDs come in all sorts of colours, brightnesses and sizes.
LEDs have to be used with a resistor to stop it from receiving too much current and burning it out. This resistor is usually a low value, like 240Ω as shown below. Hook it up like this:
We can think of this circuit in terms of the + and - sides of a battery; just like in a battery there is a flow of electricity from one side to the other. In this case our voltage is coming from the digital pin on Bela which can deliver 3.3V or 0V depending on whether it is on or off. The voltage flows through the resistor, the LED, and to ground.
The LED and resistor are connected in series, which means that the voltage in the circuit is shared between these two components. The resistor serves to drop the voltage on the LED and stop it being damaged by the current and burning out.
The way an LED is oriented - its polarity - is important. An LED has a a long leg on its positive side (the anode), and a short leg on its negative side (the cathode). You can remember this with the acronym PANIC: Positive is Anode, Negative Is Cathode.
The code
Find the digital-output sketch in the Pure Data section of the Examples tab of the Bela IDE.
1. Initialise the digital pin
To begin we initialise pin 17 as a digital output. Here you’ll see the use of [loadbang] which is a very useful object for initialising parts of your patch: It produces a bang when the project first loads up.

A `bang` is the simplest message in PD. It doesn’t have a sign or value, it just says do something. In this sense it's like a trigger.
2. Flash that LED
The [metro] object creates a bang every 1000ms (or however many milliseconds we give it as an argument). It first needs to be told to start via a bang in its top left inlet. The bang from [metro] is then sent to the [toggle] object. This object can only have two states (1 or 0) and changes between these states when it receives a bang. The output of this is connected to the [s bela_digitalOut17] object which sends either a 1 or a 0 to digital pin 17 (1 = 3.3V, 0 = 0V).

If you are ever in doubt about pin numbering when working with Bela just have a look at the interactive Pin Diagram tab of the IDE.
As well as embedding the pin diagram in the Bela IDE, we also have a version hosted at this website for quick reference at https://learn.bela.io/pin-diagram.
Practice tasks
Task 1: Change the rate of flashing
The [metro] object is responsible for generating the overall metronome which controls the timing of the flashing. Its argument defines the speed at which it generates a bang.

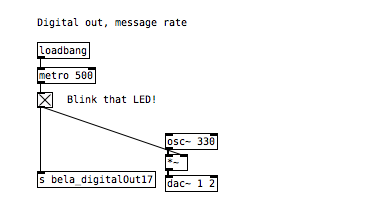
Task 2: Play a sinetone when the LED is on
We want a oscillator at a set frequency which we can then multiply by another value that we already have in our code. To create an oscillator use the [osc~ 330] object which will give a sinetone oscillator at 330Hz. Remember that in order to hear anything you need to send a audio signal to [dac~ 1 2].
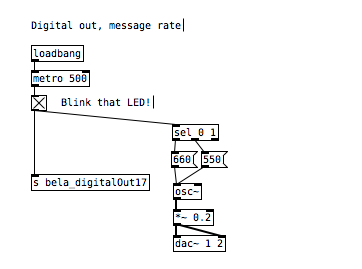
Task 3: Create a two tone siren that flashes in time with the LED
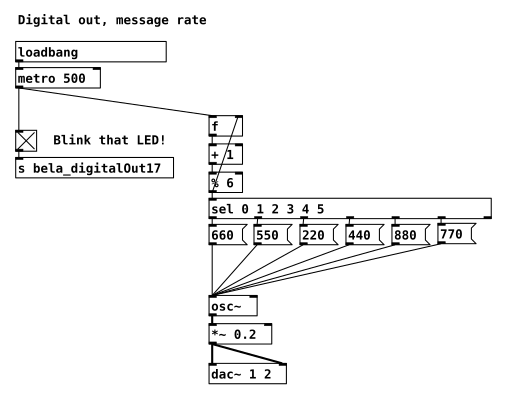
The [sel] object allows you to send signals to different outputs, depending on the input that it receives. Have a look at the help file for more information. You may want use a [message] box to store frequencies to change between and use this to change the frequency of the oscillator.
Task 4: Create a repeating pattern of note with 6 different pitches
You can create a simple counter by using a combination of an [f] object to memorize and recall a number and adding one to it with the [+ 1] object. It is then possible to reset the counter using the [%] object.