Rubber Duckie
Synthesis through physical modelling
This exercise provides a taster of a different kind of synthesis: Physical modelling. With physical modelling the physics of a specific type of sonic interaction are recreated in code, which can enable more realistic interactions with sound.
Table of contents
Squeaking
This code example is a physical model of a rubber duck, created by Christian Heinrichs. Physical modelling has a long and rich history in synthesis and involves deeply analysing the instrument or sound-producing object you want to synthesise. Once all the aspects and elements of the object that contribute to the overall timbre are well understood, it’s possible to synthesise them to recreate the sound in a very realistic way. Having a physical model also means you can then control every aspect of it in real time. This is particularly exciting when working with sensors.
If you’re interested in exploring physical modelling synthesis we recommend the work of Andy Farnell, particularly his cookbook of Pure Data physical modelling patches in Designing Sound.
Hardware setup
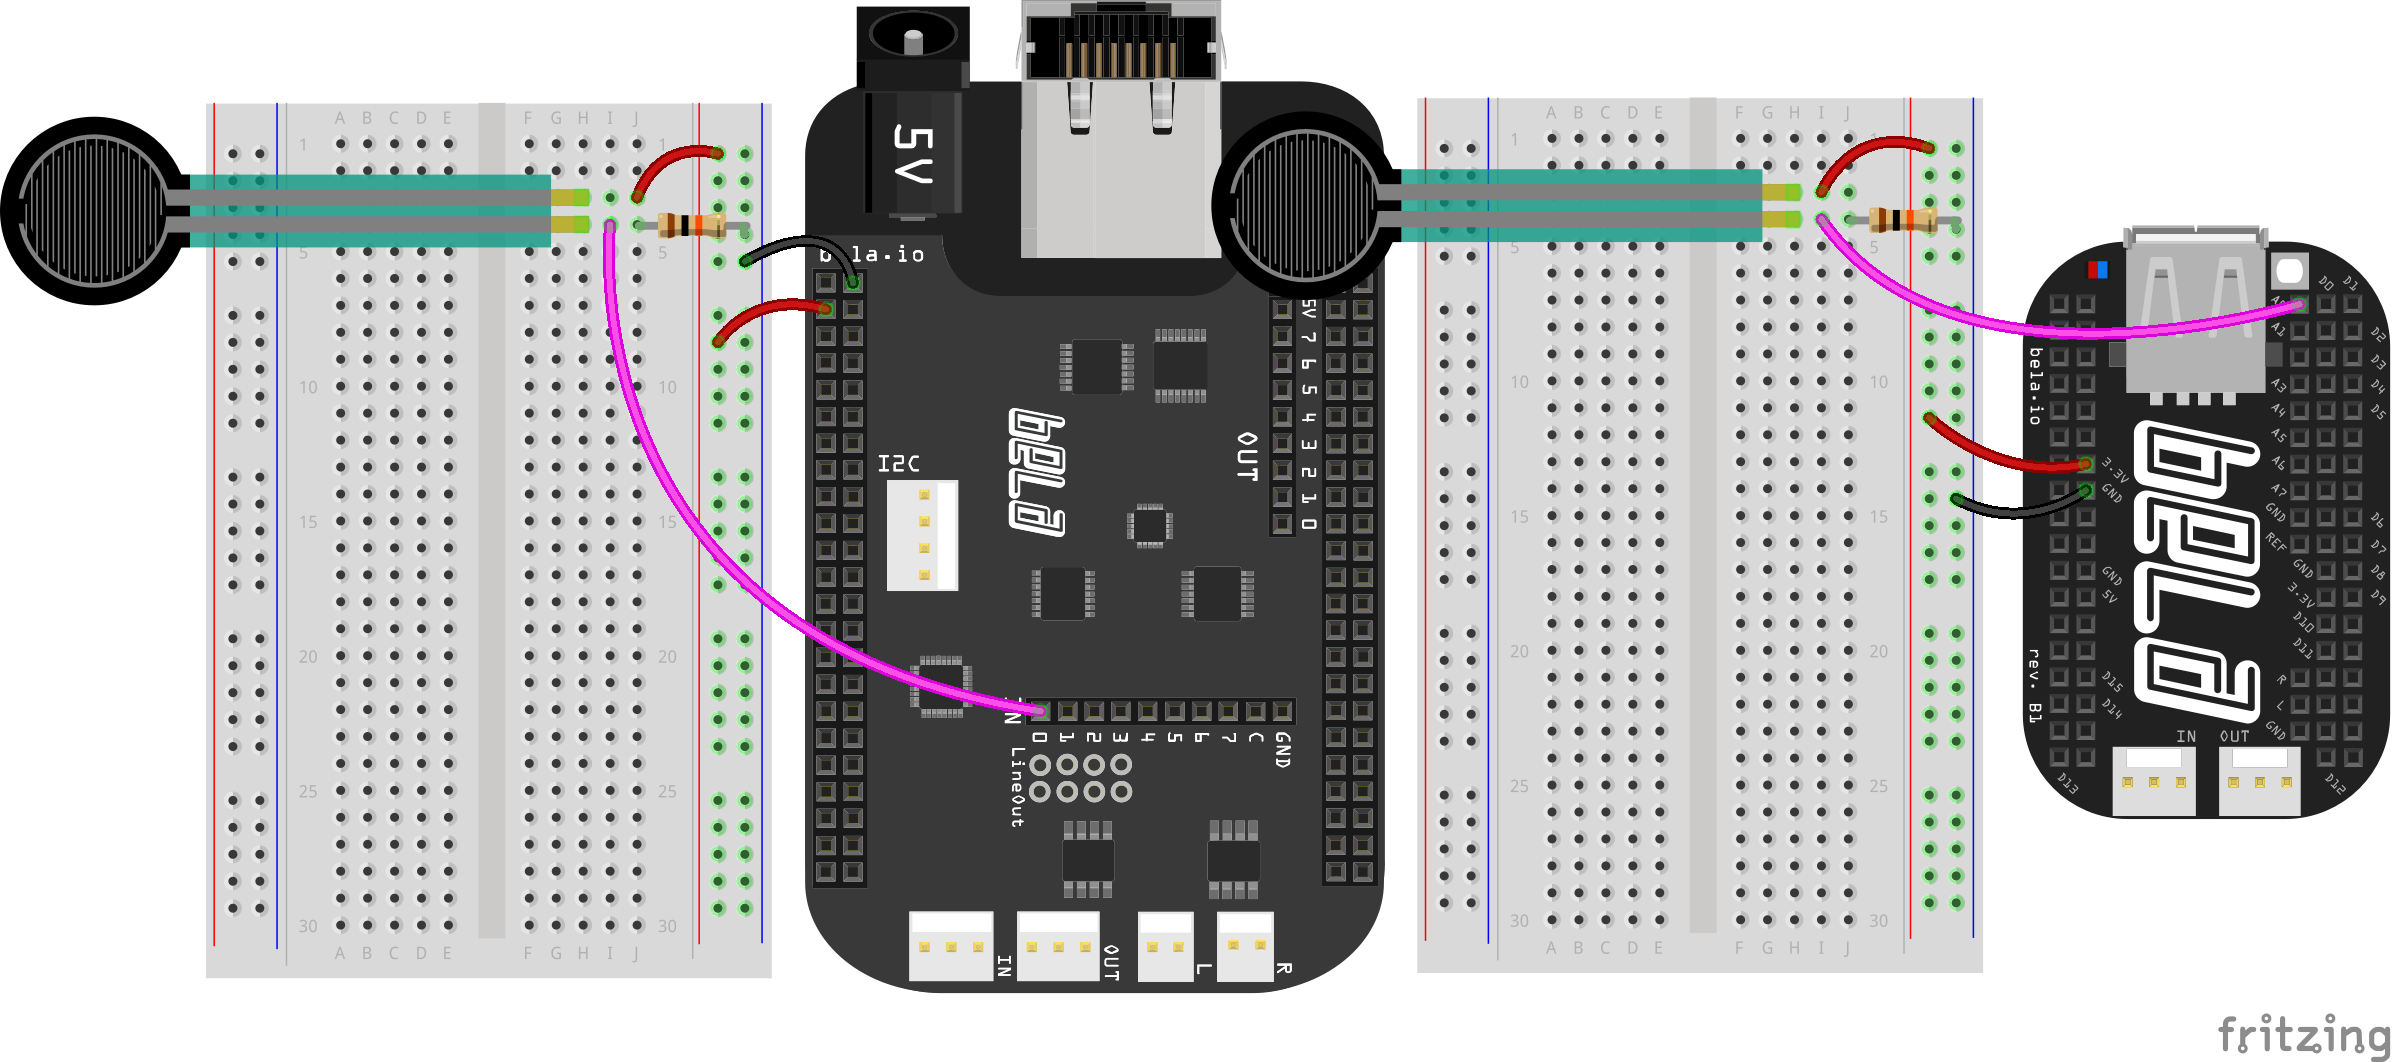
For this example we need a FSR with a 10kΩ resistor connected to Bela’s analog input 0:
The code
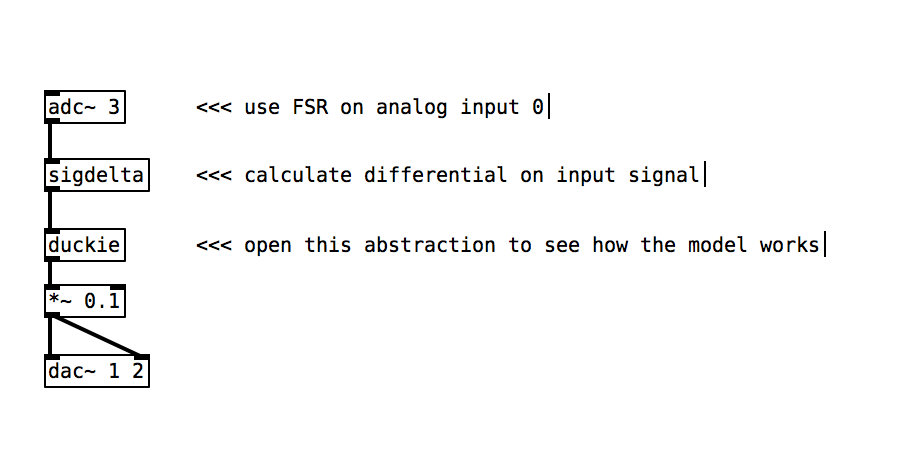
Find the rubber-duckie sketch in the Pure Data section of the Examples tab of the Bela IDE.
1. Abstractions
One important structural aspect of Pure Data patches is abstractions. Abstractions are additional patches that can live within the main patch, but exists in a separate file in the project folder. If you examine the Rubber Duckie project in the
Project Explorer tab you’ll see that in addition to the _main.pd file there’s two additional files: duckie.pd and sigdelta.pd.
2. Exploring complex Pd projects
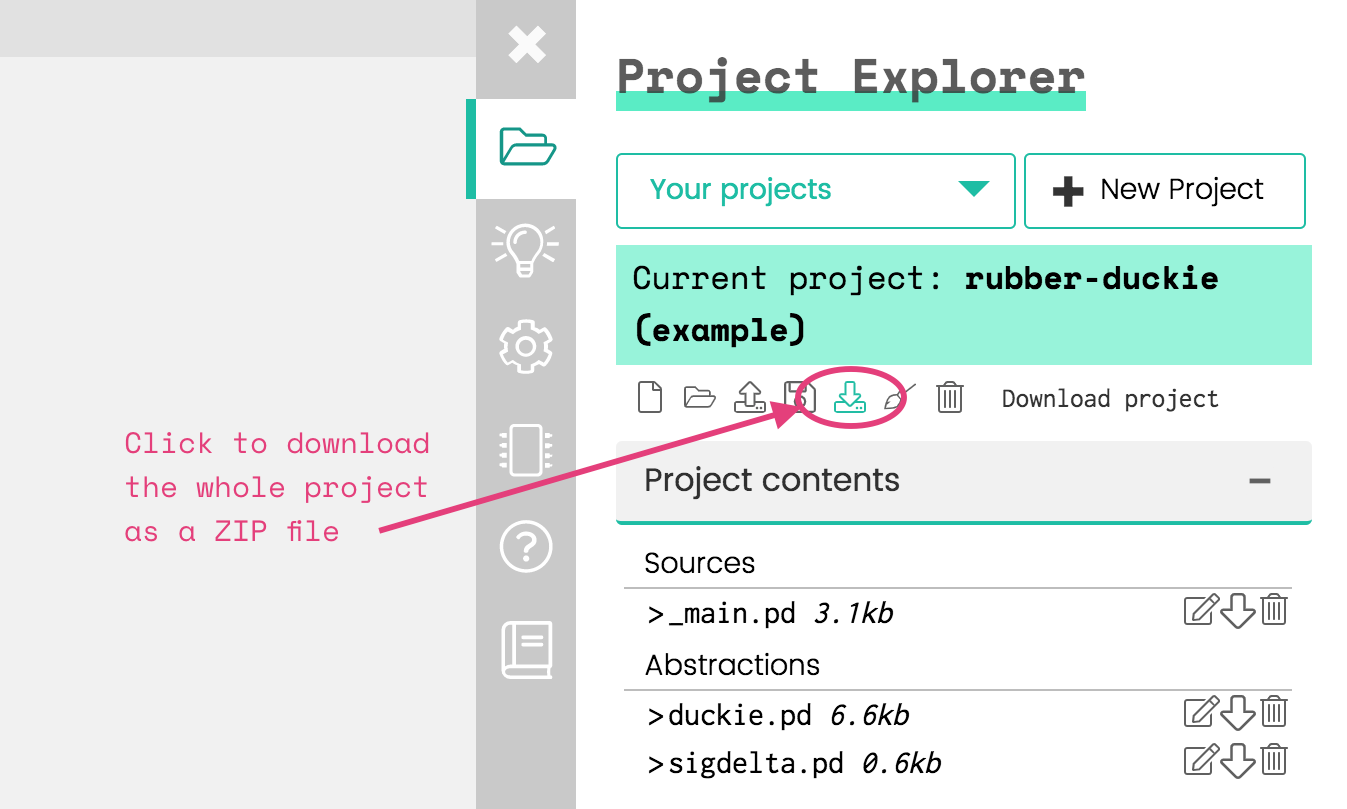
We can examine the contents of these abstractions in Pure Data, but first we’ll have to download the whole project including the abstraction files, not just _main.pd. To do so, click the Download Project button at the top of the file list. This will download the whole project as a zip file:
After downloading, unzip the archive and open _main.pd in Pure Data. In Edit mode you can click on the duckie and sigdelta abstractions in _main.pd and you’ll be able to see their contents. This is because the _main.pd file you’re viewing is in the same folder as the two abstractions.
2. Calculating the velocity
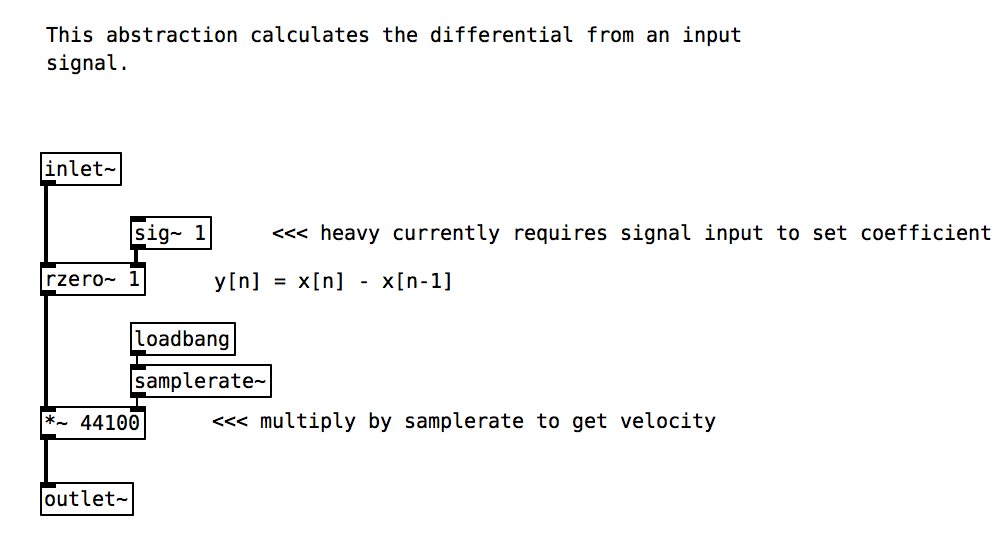
The [sigdelta] abstraction calculates the velocity of the sensor stream giving a more realistic interaction:
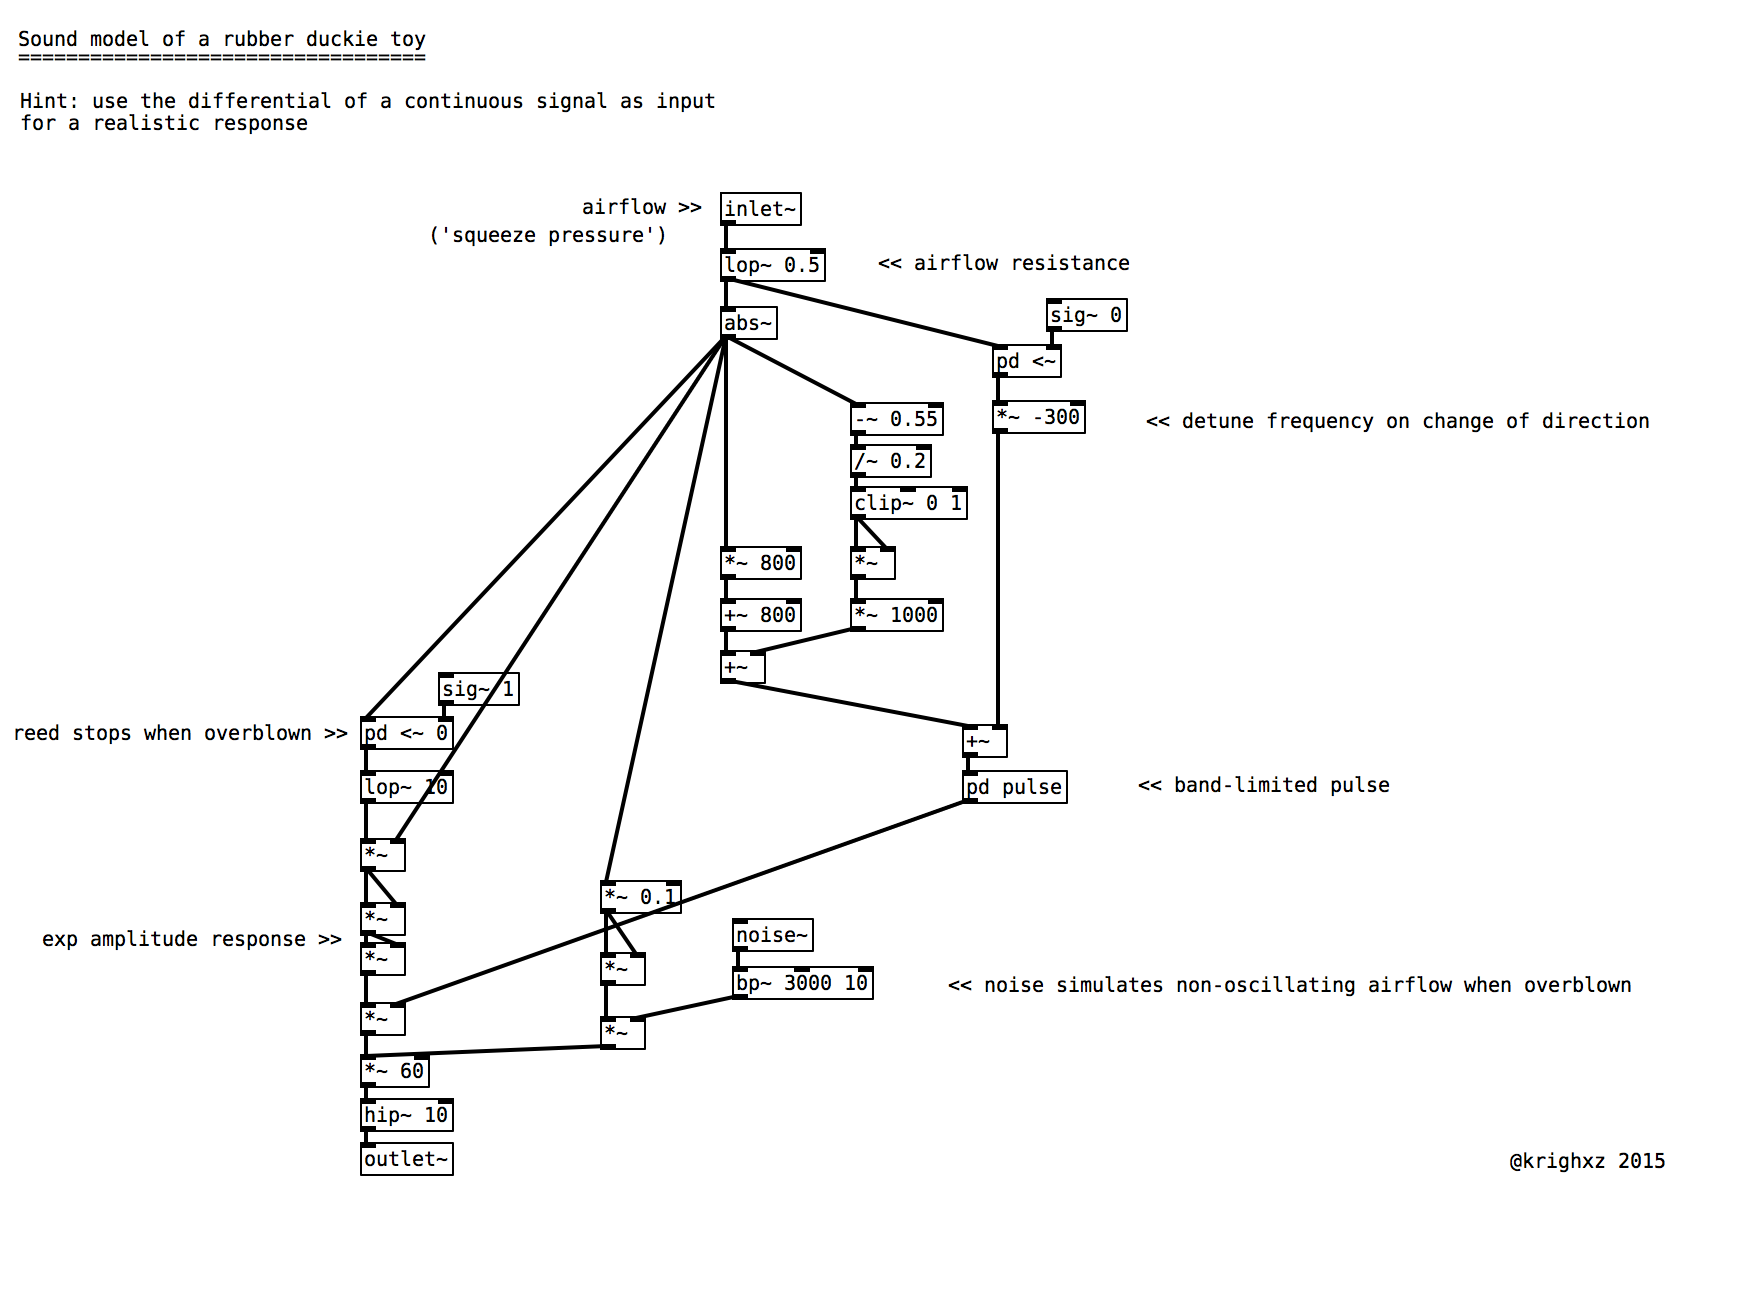
3. The physical model
This physical model calculates airflow and other aspects of a rubber duck. We won’t go into the details of this model, but open up the duckie abstraction and have a look if you’re interested.
4. Run the model
With your hardware assembled and connected, it’s time to try out this rubber duck. Connect an audio adapter to the audio output pins, plug in your headphones, and run the example in the Bela IDE using the Run button. Press the FSR - what does it sound like? How much control do you have? What happens when you press hard, and what happens when you press slowly?
Practice tasks
Task 1: Experiment with passive haptic feedback
Haptic feedback refers to the physical sensations we receive through our sense of touch when we interact with the world. When using pressure sensors such as the FSR we can change the interactive experience significantly by adding some padding material on top of the sensor. Try adding a layer of thick foam or some corrugated cardboard on top of the sensor to see how the haptic experience of using the FSR changes. If you want you can even try a soft rubber duck to get the full multimodal experience!
Task 2: control the physical model with another sensor
Although the signals that we get from analog sensors are similar (in that they are a continuously varying voltage between 0V and 5V), the mechanical properties and behaviour of different sensors make some better suited for a given task than others. Try hooking up a potentiometer to the input of this physical model, and play around with it. Notice that although you're using exactly the same physical model, the interactive and 'musical' possibilities are vastly different. What happens if you use an LDR instead?